12 Summer Baking Recipes For When You’re Craving Something Fresh – because nothing satisfies a sweet tooth quite like warm-weather treats bursting with seasonal flavors. When the days grow longer and markets overflow with ripe berries, stone fruits, and fragrant herbs, your baking should reflect nature’s bounty. These sun-kissed recipes put juicy peaches, tart lemons, plump blueberries, and tropical coconuts center stage in desserts that are as vibrant as summer itself.

From airy fruit tarts with buttery crusts to frozen no-bake delights that beat the heat, we’ve gathered a collection that celebrates summer’s effortless elegance. Imagine pulling a bubbling berry galette from the oven, its jewel-toned filling glistening, or biting into a tender coconut lime cake that tastes like sunshine. Whether you need a showstopping dessert for a backyard barbecue or a simple treat to enjoy with iced tea on the porch, these recipes deliver maximum flavor with minimum fuss.
Peach Cobbler with Vanilla Ice Cream
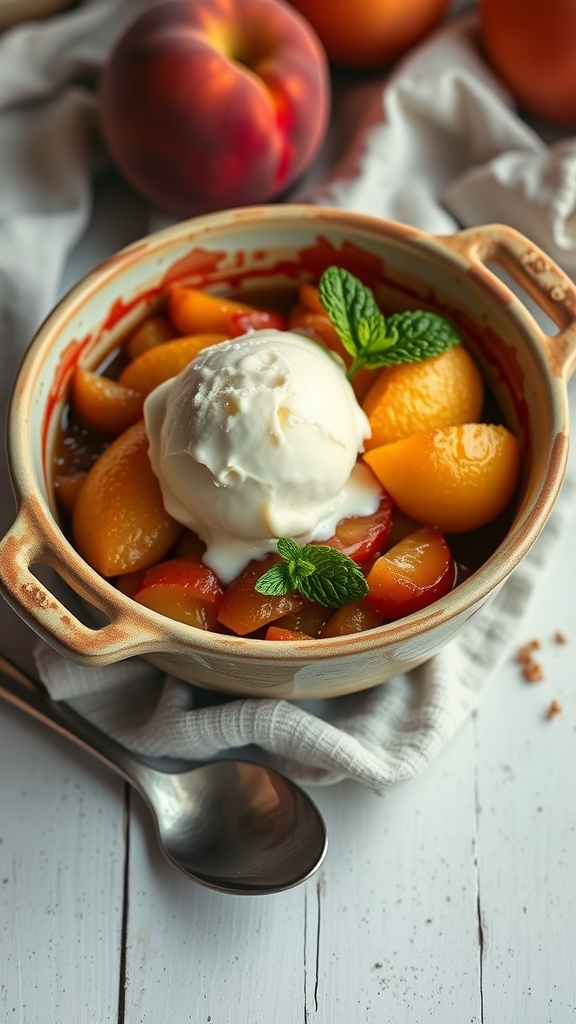
Peach cobbler is the perfect summer dessert, bringing together sweet, juicy peaches and a buttery topping that’s simply irresistible. The warm fruit contrasts beautifully with a scoop of vanilla ice cream, making each bite a delightful experience. Plus, this recipe is straightforward and quick to whip up, perfect for those warm evenings when you crave something sweet yet refreshing.
With minimal ingredients and steps, you can have a comforting dessert ready in no time. The combination of flavors and textures—soft peaches, crisp topping, and creamy ice cream—will surely please anyone at your table. Let’s get started!
Ingredients
- 4 cups sliced fresh peaches
- 1 cup granulated sugar
- 1 cup all-purpose flour
- 1 cup milk
- 1/2 cup unsalted butter, melted
- 1 tablespoon baking powder
- 1/2 teaspoon salt
- 1 teaspoon vanilla extract
- Vanilla ice cream, for serving
Instructions
- Preheat the oven to 350°F (175°C).
- In a large bowl, mix the sliced peaches with 1/2 cup of sugar and set aside to let the juices develop.
- In another bowl, combine the flour, remaining sugar, baking powder, and salt. Stir in the milk, melted butter, and vanilla extract until just combined.
- Pour the batter into a greased baking dish, then spoon the peaches over the top (including the juices).
- Bake for 40-45 minutes or until the cobbler is golden brown and a toothpick inserted comes out clean.
- Let it cool slightly before serving. Top each serving with a scoop of vanilla ice cream and enjoy!
Zesty Lemon Blueberry Muffins

Zesty Lemon Blueberry Muffins are the perfect treat for those warm summer days when you crave something light and refreshing. The bright, tangy lemon pairs beautifully with the sweet blueberries, creating a delightful balance of flavors. These muffins are simple to make, making them a great choice for both novice and experienced bakers alike.
The muffins have a moist texture and a zesty aroma that fills your kitchen as they bake. Topped with a light lemon glaze, they are sure to be a hit at brunch or as a midday snack. Enjoy these muffins fresh out of the oven or save them for later—either way, they won’t last long!
Ingredients
- 1 ½ cups all-purpose flour
- ½ cup granulated sugar
- 2 teaspoons baking powder
- ½ teaspoon baking soda
- ¼ teaspoon salt
- 1 large egg
- ¾ cup buttermilk
- ¼ cup unsalted butter, melted
- 2 tablespoons lemon zest
- 1 cup fresh blueberries
- 1 tablespoon lemon juice
- 1 cup powdered sugar (for glaze)
- 1 tablespoon lemon juice (for glaze)
Instructions
- Preheat the oven to 375°F (190°C) and line a muffin tin with paper liners.
- In a large bowl, mix together the flour, sugar, baking powder, baking soda, and salt.
- In a separate bowl, whisk the egg, buttermilk, melted butter, lemon zest, and lemon juice until well combined.
- Pour the wet ingredients into the dry ingredients and stir until just combined. Gently fold in the blueberries.
- Divide the batter evenly among the muffin cups, filling each about two-thirds full.
- Bake for 18-20 minutes, or until a toothpick inserted into the center comes out clean.
- While the muffins cool, prepare the glaze by mixing powdered sugar and lemon juice until smooth. Drizzle over the cooled muffins.
Mango Sorbet with Mint

Mango sorbet with mint is a refreshing treat perfect for hot summer days. This simple recipe captures the vibrant sweetness of ripe mangoes, balanced by the coolness of fresh mint. With just a few ingredients, you can whip up this delightful dessert in no time!
The taste is light and fruity, making it a great way to satisfy your sweet tooth without being overly indulgent. Plus, it’s easy to make at home, offering a fun, DIY twist on a classic frozen treat.
Ingredients
- 4 ripe mangoes, peeled and diced
- 1/2 cup granulated sugar
- 1 tablespoon lime juice
- 1/2 cup fresh mint leaves
- 1/2 cup water
Instructions
- Blend the mangoes: In a blender, combine the diced mangoes and lime juice. Blend until smooth.
- Prepare the syrup: In a saucepan, heat the water and sugar over medium heat until the sugar dissolves, then remove from heat. Add the mint leaves and let steep for about 10 minutes.
- Combine: Strain the mint syrup into the blended mango puree, discarding the mint leaves. Mix well.
- Chill: Pour the mixture into a shallow dish and place it in the freezer for about 2-3 hours, stirring every 30 minutes to break up the ice crystals.
- Serve: Once the sorbet is fully frozen and fluffy, scoop it into bowls and garnish with fresh mint leaves. Enjoy!
Coconut Lime Bars
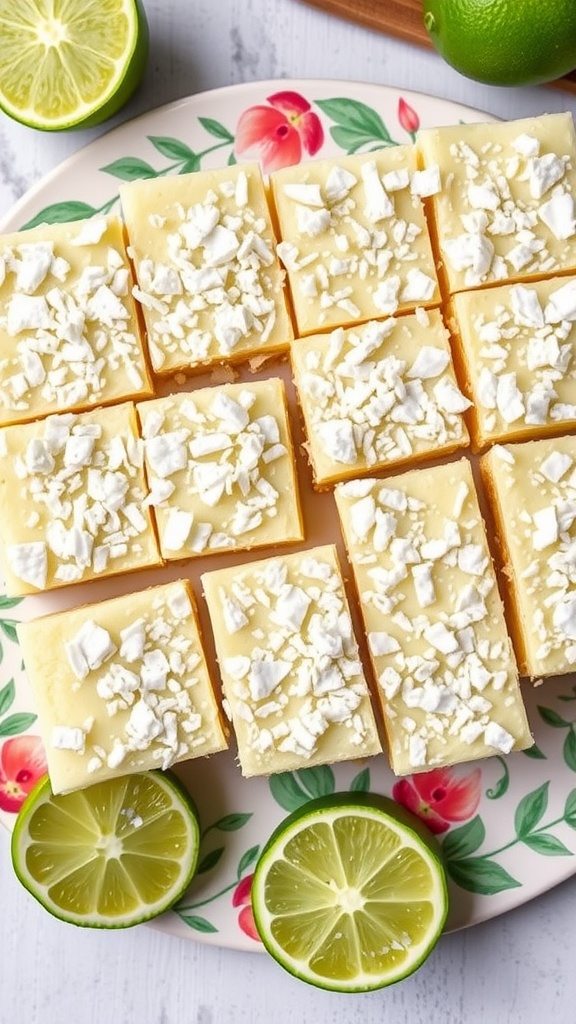
Coconut lime bars are a delightful treat that perfectly balance tart and sweet flavors. With a refreshing lime zing paired with creamy coconut, these bars are a summer staple. Plus, they’re simple to whip up, making them an ideal dessert for gatherings or just when you want something refreshing.
With their buttery crust and creamy filling, each bite melts in your mouth, leaving you yearning for more. These bars offer a taste of tropical paradise right in your kitchen, making them the perfect summer snack.
Ingredients
- 1 ½ cups graham cracker crumbs
- ½ cup unsweetened shredded coconut
- ½ cup unsalted butter, melted
- 1 cup sweetened condensed milk
- ½ cup fresh lime juice
- 2 large eggs
- 1 teaspoon lime zest
- ¼ teaspoon salt
- Extra shredded coconut for topping
Instructions
- Preheat the oven to 350°F (175°C) and grease a 9×9-inch baking pan.
- In a bowl, mix graham cracker crumbs, shredded coconut, and melted butter until combined. Press the mixture firmly into the bottom of the prepared pan to form the crust.
- In another bowl, whisk together sweetened condensed milk, lime juice, eggs, lime zest, and salt until smooth. Pour the filling over the crust.
- Bake for about 20-25 minutes, or until the filling is set and the edges start to slightly brown. Remove from the oven and let it cool.
- Top with extra shredded coconut if desired, slice into squares, and serve chilled or at room temperature.
Honeydew Melon Cake

Honeydew Melon Cake brings a refreshing twist to your summer baking. This cake is light, fluffy, and packed with the sweet and juicy flavor of melon, making it a perfect treat for warm days. With layers of whipped cream and subtle sweetness, this cake is easy to whip up, making it a great choice for both beginners and seasoned bakers.
The delightful combination of honeydew and cream creates a luscious experience that’s not overly heavy. It’s a lovely way to showcase seasonal fruit and impress your friends at summer gatherings. Let’s get baking!
Ingredients
- 1 ½ cups all-purpose flour
- 1 cup granulated sugar
- ½ cup unsalted butter, softened
- 2 large eggs
- 1 cup honeydew melon puree
- 1 teaspoon baking powder
- ½ teaspoon baking soda
- ¼ teaspoon salt
- 1 teaspoon vanilla extract
- 2 cups heavy cream
- ¼ cup powdered sugar
- Extra honeydew melon slices for decoration
Instructions
- Preheat your oven to 350°F (175°C). Grease and flour two 8-inch round cake pans.
- In a mixing bowl, cream together the butter and granulated sugar until light and fluffy. Add the eggs one at a time, beating well after each addition.
- Stir in the honeydew melon puree and vanilla extract until fully combined.
- In another bowl, whisk together the flour, baking powder, baking soda, and salt. Gradually add to the wet ingredients, mixing until just combined.
- Divide the batter evenly between the prepared pans and smooth the tops. Bake for 25-30 minutes, or until a toothpick comes out clean. Let cool in the pans for 10 minutes, then transfer to wire racks to cool completely.
- While the cakes cool, prepare the whipped cream. In a large bowl, beat the heavy cream and powdered sugar until soft peaks form.
- Once the cakes are cool, spread a layer of whipped cream between the layers and on top. Decorate with additional honeydew melon slices on top for a fresh finish.
Strawberry Shortcake with Homemade Whipped Cream
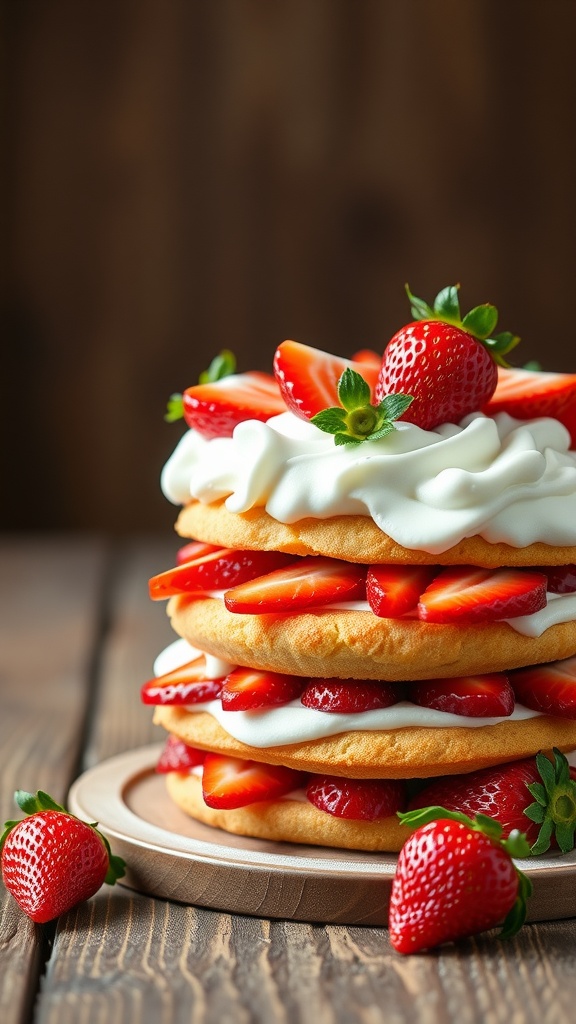
Nothing says summer quite like a classic strawberry shortcake. This dessert combines juicy, ripe strawberries with light and fluffy cake layers, all topped off with a generous helping of homemade whipped cream. It’s a delightful mix of sweet and tart flavors, making it a perfect treat for sunny days or casual gatherings.
What makes this recipe even better is how simple it is to prepare. With fresh strawberries and a few basic ingredients, you can whip up this crowd-pleaser in no time. Whether you’re enjoying it at a picnic or serving it at a family barbecue, it’s sure to impress!
Ingredients
- 2 cups fresh strawberries, hulled and sliced
- 1/4 cup granulated sugar
- 2 cups all-purpose flour
- 1/4 cup baking powder
- 1/2 teaspoon salt
- 1/4 cup unsalted butter, softened
- 1 cup milk
- 2 large eggs
- 1 teaspoon vanilla extract
- 2 cups heavy cream
- 3 tablespoons powdered sugar
Instructions
- Prepare the Strawberries: In a bowl, combine the sliced strawberries with granulated sugar. Let them sit for about 30 minutes to release their juices.
- Make the Cake: Preheat your oven to 350°F (175°C). In a mixing bowl, combine flour, baking powder, and salt. In another bowl, beat the butter and sugar until creamy. Add eggs one at a time, then mix in milk and vanilla. Gradually add the flour mixture until just combined.
- Bake the Cake: Pour the batter into a greased cake pan and bake for 25-30 minutes, or until a toothpick comes out clean. Let the cake cool completely.
- Whip the Cream: In a chilled bowl, beat the heavy cream with powdered sugar until soft peaks form.
- Assemble: Slice the cooled cake into layers. On each layer, add a portion of strawberries and whipped cream. Stack the layers, finishing with whipped cream and a few fresh strawberries on top.
Lavender Lemonade Cookies
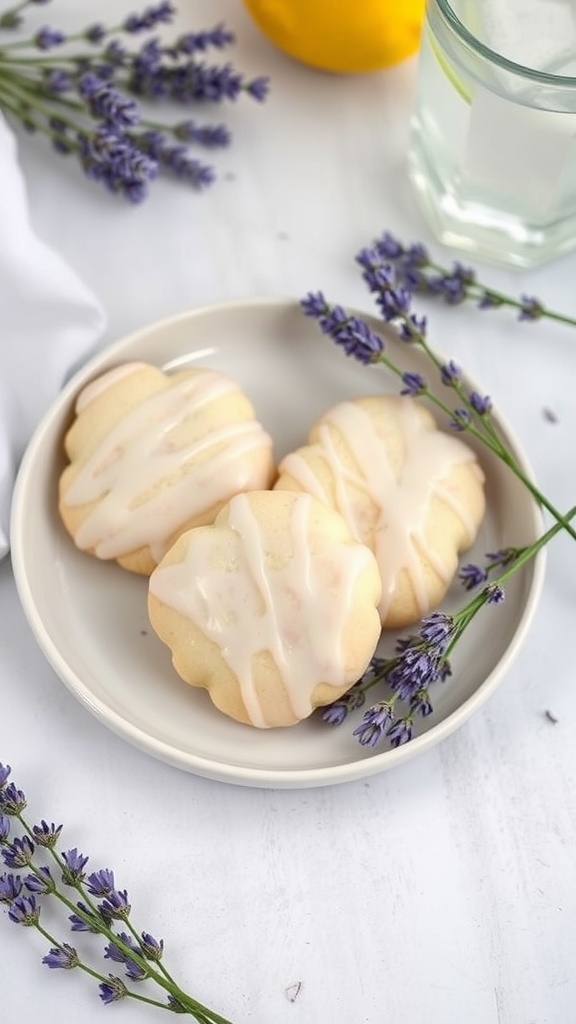
Lavender lemonade cookies are a delightful treat that perfectly blends floral and citrus flavors. They offer a unique taste experience with a refreshing zing from the lemon and a subtle hint of lavender, making them ideal for summer gatherings or a cozy afternoon snack.
This recipe is simple and quick, perfect for bakers of any skill level. You’ll love how easy it is to whip up a batch, and the delightful aroma will fill your kitchen as they bake. Enjoy these cookies with a cold glass of lemonade for the ultimate summer refreshment!
Ingredients
- 1 cup unsalted butter, softened
- 1 cup granulated sugar
- 2 large eggs
- 1 tablespoon lemon zest
- 1/4 cup fresh lemon juice
- 1 teaspoon dried lavender
- 2 3/4 cups all-purpose flour
- 1 teaspoon baking powder
- 1/2 teaspoon salt
- 1 cup powdered sugar (for glaze)
- 2 tablespoons lemon juice (for glaze)
- 1 teaspoon dried lavender (for garnish)
Instructions
- Preheat the oven to 350°F (175°C) and line a baking sheet with parchment paper.
- In a large bowl, cream together the softened butter and granulated sugar until light and fluffy. Add in the eggs, lemon zest, and lemon juice, mixing until well combined.
- In another bowl, whisk together the flour, baking powder, salt, and dried lavender. Gradually add this dry mixture to the wet ingredients, stirring until a dough forms.
- Drop rounded tablespoons of dough onto the prepared baking sheet, spacing them about 2 inches apart. Bake for 10-12 minutes or until the edges are lightly golden.
- While the cookies cool, prepare the glaze by mixing powdered sugar and lemon juice until smooth. Drizzle the glaze over the cooled cookies and sprinkle with dried lavender. Allow the glaze to set before serving.
Raspberry Almond Tart
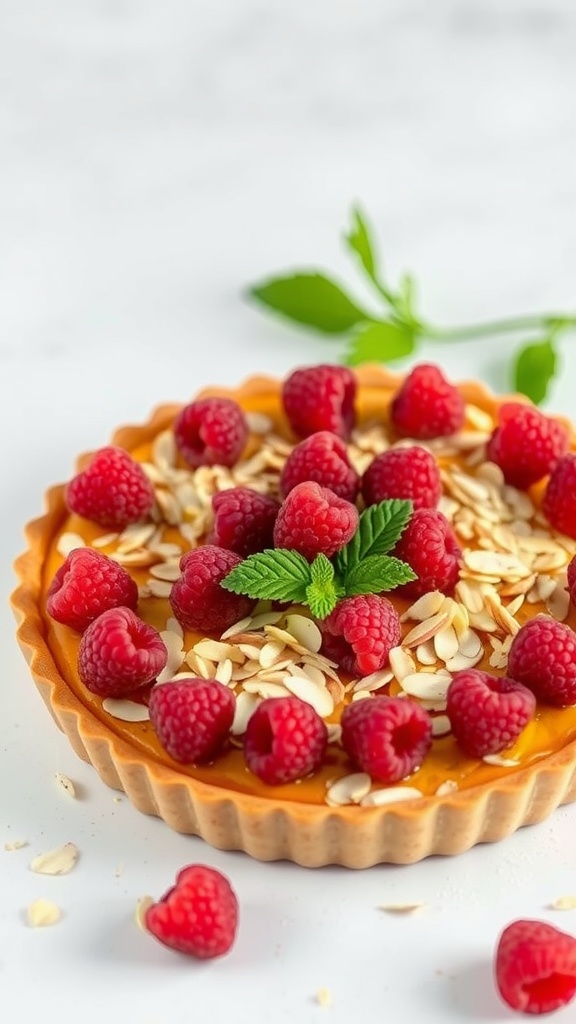
The Raspberry Almond Tart is a delightful treat that brings together the tartness of fresh raspberries and the nutty flavor of almonds. Perfect for summer, this tart is light and refreshing, making it an ideal dessert for warm days. Plus, it’s simple to whip up, even for those new to baking!
This tart features a buttery almond crust filled with creamy almond frangipane, topped generously with ripe raspberries and a sprinkle of sliced almonds for an added crunch. Each slice offers a balance of sweetness and tartness, leaving you craving more. It’s a fantastic way to enjoy seasonal fruits with a touch of elegance!
Ingredients
- 1 ½ cups almond flour
- ½ cup all-purpose flour
- ½ cup unsalted butter, softened
- ¾ cup powdered sugar
- 1 large egg
- 1 teaspoon vanilla extract
- 2 cups fresh raspberries
- ¼ cup sliced almonds
- Pinch of salt
Instructions
- Make the Crust: In a bowl, mix almond flour, all-purpose flour, and salt. Add softened butter and powdered sugar, and blend until crumbly. Stir in the egg and vanilla extract until a dough forms.
- Shape and Chill: Press the dough into a tart pan evenly across the base and up the sides. Chill in the refrigerator for 30 minutes.
- Preheat the Oven: Preheat your oven to 350°F (175°C).
- Bake the Crust: Bake the chilled crust for about 15 minutes or until lightly golden. Remove from the oven and let it cool.
- Prepare the Filling: In a bowl, combine almond flour, powdered sugar, and the remaining egg. Mix until smooth and pour into the cooled tart shell.
- Add Raspberries: Gently place the raspberries on top of the almond filling, pressing them in slightly. Sprinkle sliced almonds over the top.
- Bake Again: Bake for an additional 25-30 minutes until the filling is set and golden brown. Allow to cool before serving.
Cherry Almond Galette
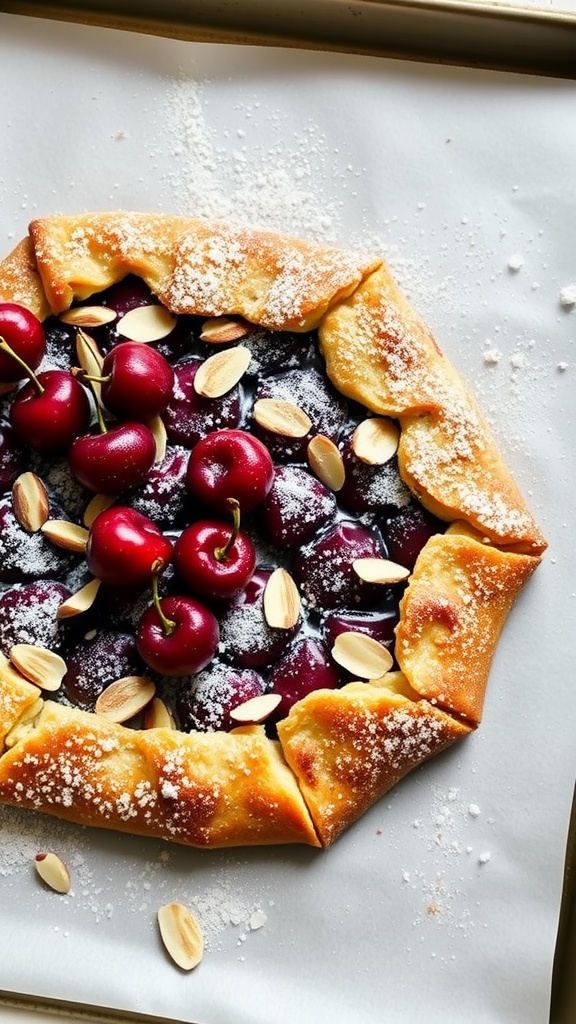
This Cherry Almond Galette is a delightful combination of sweet, tart cherries and a hint of almond flavor, all wrapped in a flaky, buttery crust. The rustic presentation makes it look impressive, but it’s surprisingly easy to put together, making it a perfect choice for summer gatherings or a cozy night in.
The galette has a crispy exterior with a juicy filling that bursts with flavor. Each bite is a lovely mix of textures, and a sprinkle of powdered sugar on top adds a touch of sweetness. You’ll love how quickly it comes together and how it fills your kitchen with a heavenly aroma!
Ingredients
- 1 ½ cups fresh cherries, pitted and halved
- 2 tablespoons granulated sugar
- 1 tablespoon cornstarch
- 1 teaspoon almond extract
- 1 tablespoon lemon juice
- 1 pre-made pie crust (store-bought or homemade)
- 1 egg, beaten (for egg wash)
- ¼ cup sliced almonds
- Powdered sugar, for dusting
Instructions
- Preheat your oven to 375°F (190°C).
- In a bowl, combine the cherries, granulated sugar, cornstarch, almond extract, and lemon juice. Toss until the cherries are well coated.
- Roll out the pie crust on a parchment-lined baking sheet. Leave a 2-inch border around the edges.
- Spread the cherry mixture in the center of the crust, then fold the edges over the filling, pinching to secure.
- Brush the crust with the beaten egg and sprinkle the sliced almonds on top.
- Bake for 30-35 minutes, until the crust is golden brown and the cherries are bubbly.
- Allow to cool slightly, then dust with powdered sugar before serving.
Chilled Cucumber and Dill Bread

This chilled cucumber and dill bread is a refreshing twist on traditional bread, perfect for summer days. With a light, airy texture and a burst of flavor from fresh dill and cucumber, it’s a delightful addition to any picnic or gathering.
Making this bread is simple and fun! The mixture of cucumbers brings a mild sweetness, while dill adds a herby note that complements the dish beautifully. Serve it with cream cheese or your favorite spread for a tasty snack.
Ingredients
- 2 cups all-purpose flour
- 1 teaspoon baking powder
- 1/2 teaspoon baking soda
- 1 teaspoon salt
- 1 cup plain yogurt
- 1 cup finely grated cucumber (squeeze out excess moisture)
- 1/4 cup fresh dill, chopped
- 2 tablespoons olive oil
- 1 tablespoon lemon juice
Instructions
- Preheat your oven to 375°F (190°C). Grease a loaf pan.
- In a large bowl, whisk together flour, baking powder, baking soda, and salt.
- In another bowl, combine yogurt, grated cucumber, dill, olive oil, and lemon juice. Mix well.
- Fold the wet ingredients into the dry ingredients until just combined. Do not overmix.
- Pour the batter into the prepared loaf pan and smooth the top. Bake for 40-45 minutes, or until a toothpick inserted in the center comes out clean.
- Allow to cool in the pan for 10 minutes before transferring to a wire rack to cool completely. Slice and serve chilled.
Blackberry Crisp with Oat Topping

Blackberry crisp with oat topping is a delightful summer dessert that perfectly balances the tartness of fresh blackberries with a sweet, crunchy oat topping. It’s an easy recipe that requires just a few simple ingredients, making it a go-to option for warm evenings when you’re craving something fruity and comforting.
The combination of warm, juicy blackberries and a crisp, buttery topping creates a satisfying texture and taste that can be enjoyed on its own or paired with a scoop of vanilla ice cream. This recipe is not only quick to prepare, but it also allows you to enjoy the fresh flavors of summer.
Ingredients
- 4 cups fresh blackberries
- 1/2 cup granulated sugar
- 1 tablespoon lemon juice
- 1 cup rolled oats
- 1/2 cup all-purpose flour
- 1/3 cup brown sugar, packed
- 1/2 teaspoon cinnamon
- 1/4 cup unsalted butter, melted
- Pinch of salt
Instructions
- Preheat the oven to 350°F (175°C). In a mixing bowl, combine the blackberries, granulated sugar, and lemon juice. Toss gently to coat the berries.
- Transfer the blackberry mixture to a baking dish, spreading it evenly.
- In another bowl, mix the rolled oats, flour, brown sugar, cinnamon, and salt. Pour in the melted butter and stir until the mixture is crumbly.
- Sprinkle the oat topping over the blackberry layer, covering it evenly.
- Bake for 30-35 minutes, or until the topping is golden brown and the berries are bubbling. Let it cool slightly before serving.
- Serve warm, topped with a scoop of vanilla ice cream if desired.
Pineapple Upside-Down Cake
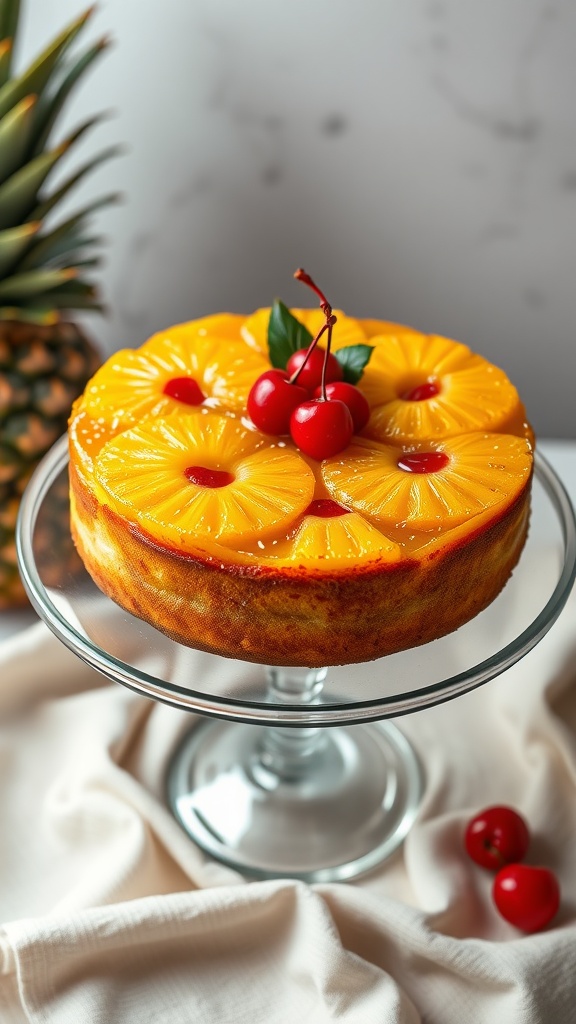
Pineapple upside-down cake is a delightful twist on a classic dessert that brings summer vibes to your table. With its caramelized pineapple topping and soft, buttery cake base, this treat offers a perfect balance of sweetness and fruitiness. It’s simple to make, making it a great choice for both beginners and seasoned bakers alike.
The cake’s beautiful presentation is sure to impress your family and friends. Plus, it’s an excellent way to use fresh or canned pineapple for a burst of flavor. Whether served warm or at room temperature, this cake is a must-try for your summer baking list!
Ingredients
- 1/4 cup unsalted butter
- 3/4 cup brown sugar, packed
- 1 can (20 oz) sliced pineapple, drained
- Maraschino cherries (optional, for decoration)
- 1 1/2 cups all-purpose flour
- 1 cup granulated sugar
- 2 tsp baking powder
- 1/2 tsp salt
- 1/2 cup whole milk
- 1/2 cup unsalted butter, softened
- 2 large eggs
- 1 tsp vanilla extract
Instructions
- Preheat your oven to 350°F (175°C). In a round baking pan, melt 1/4 cup of butter in the oven. Once melted, sprinkle 3/4 cup of brown sugar evenly over the butter.
- Arrange the pineapple slices on top of the brown sugar mixture and place a cherry in the center of each pineapple slice if desired.
- In a mixing bowl, combine flour, granulated sugar, baking powder, and salt. In another bowl, whisk together milk, softened butter, eggs, and vanilla until smooth.
- Gradually add the wet ingredients to the dry ingredients, mixing until just combined. Pour the batter over the pineapple layer in the pan.
- Bake for 35-40 minutes or until a toothpick inserted in the center comes out clean. Let it cool for about 10 minutes, then invert onto a serving plate.
Final Thoughts
Summer baking should be as carefree as the season itself – less about complicated techniques and more about highlighting nature’s sweetest offerings at their peak. These recipes prove you don’t need heavy desserts when you can have light, fruit-forward creations that capture summer’s essence in every bite. Keep your kitchen cool with no-bake options or embrace the warmth of the oven for golden-crusted pies worth every degree. Whatever you choose to make, let seasonal produce be your guide and summer’s relaxed vibe your inspiration. Happy baking!