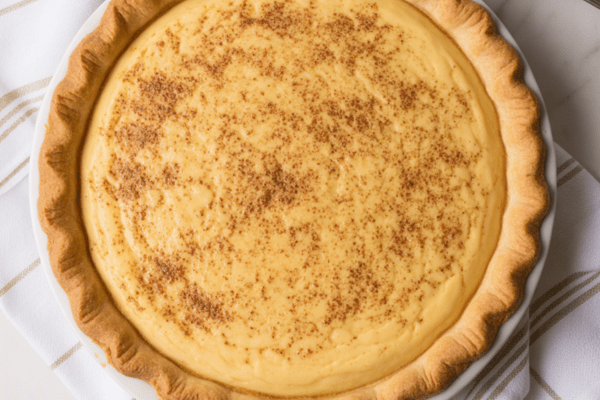
Custard Pie is one of those desserts that feels like home to me. It’s silky, creamy, and old-fashioned in the best way, with that golden custard filling tucked into a flaky crust and a sprinkle of nutmeg on top. Every bite reminds me of family dinners where someone always insisted on “just a small slice” and then went back for seconds.

Why You’ll Love This Recipe
If you’re anything like me, you appreciate desserts that feel comforting and a little nostalgic. This custard pie has that dreamy, melt-in-your-mouth texture thanks to careful, easy steps. I’ve ruined my fair share of custards over the years (scrambled eggs in a pie crust? No thanks), so this version is all about making sure you get it just right.
This is the pie I pull out for holiday meals when I want everyone to feel extra cared for. It slices beautifully, making it look impressive on the table. And don’t be surprised if someone asks to take a slice home.
Ingredients
One of my favorite things about this recipe is how simple the ingredient list is—basic pantry staples come together to make something so luxurious.
- Eggs: I like using large, free-range eggs if I can get them. You’ll need whole eggs plus an extra yolk for added richness.
- Milk: Whole milk is the only way to go for that classic, creamy texture.
- Heavy Cream: Don’t skimp here. I use heavy whipping cream or double cream. Anything lighter just doesn’t set the same.
- Sugar: I reach for superfine sugar if I have it—it dissolves more easily and makes the filling smooth.
- Vanilla: I usually grab my vanilla bean paste for a little extra punch, but good vanilla extract works too.
- Nutmeg: I’m partial to freshly grated. It’s one of those small touches that makes the whole kitchen smell like the holidays.
- Pie Dough: I often make my own, but store-bought works in a pinch—because life is busy and pie should be easy.
Make the Pie Crust
When I have time, I love making my own flaky crust. There’s something so satisfying about rolling out the dough, crimping the edges, and seeing it turn golden in the oven. I use a food processor for mine because it’s fast and gives me consistent results.
If you’re not in the mood to fuss with homemade, I completely get it. A good-quality store-bought crust will still make a great pie. I’ve done both and no one has ever complained about a slice.
Make Pie Dough
I usually make my dough the night before so it can rest properly in the fridge. Letting it chill helps the gluten relax, making it easier to roll out and less prone to shrinking in the oven. Plus, it splits up the work, which is helpful if you’re prepping for a big meal.
Roll the Dough
On baking days, I clear off my countertop, sprinkle a little flour, and roll the dough out until it’s about ⅛ inch thick.
A little tip: I always make sure the dough is about 1–2 inches bigger than my pie plate so I have room to tuck and crimp the edges. I love making those pretty scalloped edges—it’s like the pie’s fancy little collar.
Crimp
After pressing the dough gently into the pie dish, I tuck the edges under and crimp them. Docking the bottom with a fork is a must—otherwise, you risk bubbles puffing up and ruining that flat surface you need for the custard.
Chill
I pop the crust back in the fridge for at least 30 minutes. This helps prevent it from shrinking in the oven. Honestly, this step is one of those things you don’t think matters until you skip it once.
Add Pie Weights
When I blind bake, I use either ceramic weights or dried rice. I always fill them all the way up the sides so they hold their shape. While the oven heats, I like to put the prepared crust in the fridge (or freezer) one last time. Cold crust, hot oven—that’s the secret to a crisp base.
Blind Bake
I bake it at 425°F until the edges start turning golden. Then I remove the weights and parchment, give the inside a quick brush with egg wash, and finish par-baking it for a few more minutes.
This egg wash step seals up any little holes that might let the custard leak through, which is such a lifesaver. Nobody wants a soggy bottom.
How to Make Custard Pie
Custard pie is straightforward, but the details really matter. I’ve messed up enough custards over the years to know the small stuff is everything.
Whisk Eggs and Sugar
When I whisk the eggs and sugar together, I’m careful not to go too hard. A gentle hand keeps air bubbles out of the mix, which helps the custard bake up smooth instead of foamy on top.
Scald the Milk
This is one step I never skip. I heat the milk, cream, and vanilla until steam rises and tiny bubbles hug the edge of the pot.
That gentle heat brings out the vanilla flavor in such a lovely way. The smell is like a promise that dessert is coming soon.
Temper the Eggs
I learned the hard way that dumping all the hot milk in at once is a disaster—hello scrambled eggs. Instead, I add the milk slowly, whisking constantly. It’s a small moment of patience that pays off with the silkiest custard.
Strain
I always strain my custard before pouring it into the crust. Even if you think you tempered perfectly, this step catches any tiny bits of cooked egg. It’s that last safeguard for a flawless texture.
Fill the Pie
Once it’s silky-smooth, I pour the filling into the cooled, par-baked crust. A sprinkle of nutmeg over the top is non-negotiable for me—it makes the whole pie smell like old-fashioned comfort.
I like to brush the crust with a bit of egg wash so it bakes up shiny and golden.
Bake
I slide the pie gently into the oven and resist the urge to peek too often. I know it’s done when the edges are set but the center still has a good jiggle—it finishes setting as it cools.
After baking, I let it cool completely on the counter before chilling it in the fridge for at least four hours. This wait is torture, but necessary. The custard firms up beautifully, making clean slices that hold their shape.
How to Tell When Custard Pie is Baked
Custard pies can be tricky because they keep cooking after you pull them from the oven. I always use the jiggle test: tap the side of the pie dish near the end of baking.
- Needs Longer: The whole surface moves like water.
- Just Right: The edges are firm while the middle jiggles like soft jelly.
- Overbaked: No movement at all—it’ll end up rubbery.
Try other pie recipes:
Why Scald the Milk?
Sure, modern milk is safe to drink without scalding, but that’s not why I do it.
Scalding the milk changes its proteins to make the custard thicker and creamier. It helps the eggs blend in without curdling, giving that impossibly smooth texture.
It also draws out the vanilla beautifully. My kitchen always smells like a bakery at this step.
And since the custard starts warm, it bakes faster and at a lower temperature, helping the crust stay golden instead of burning.
It’s such a simple step that gives you bakery-level results.
Equipment
- 9-inch Deep Dish Pie Plate
- Rolling Pin
- Pie Weights or Rice
- Pastry Brush
- Large Mixing Bowl
Storage
I always chill mine in the fridge, covered with plastic wrap or in an airtight container. It keeps well for up to four days.
If I’m feeling fancy, I serve it with a dollop of whipped cream. It’s honestly the best way to end a meal, especially if you’re sharing it with friends or family who appreciate a good old-fashioned dessert.
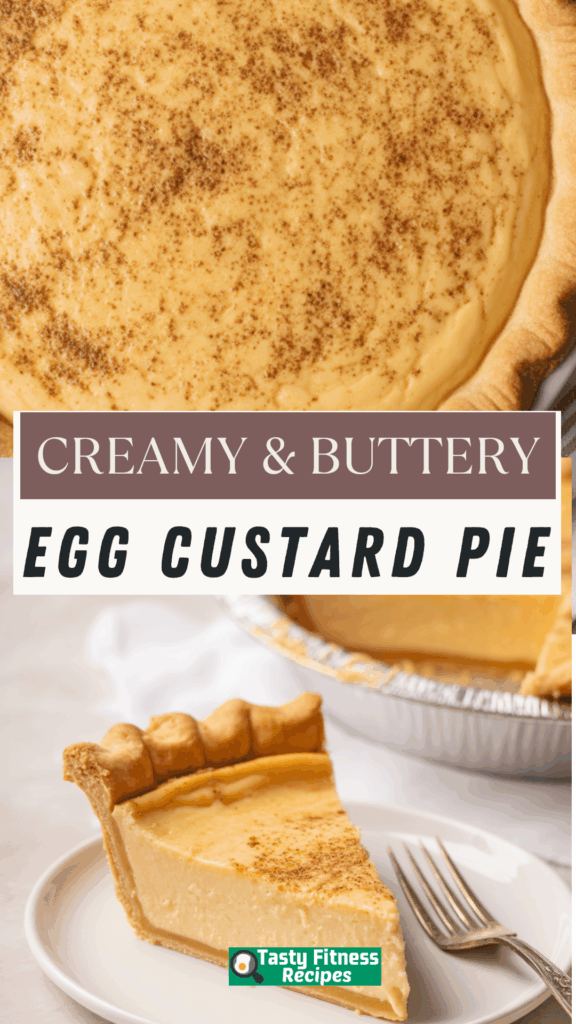
Egg Custard Pie
There’s nothing quite like a slice of homemade custard pie—cool, creamy, and delicately sweet. With its smooth, velvety center and flaky golden crust, this timeless dessert is a celebration of simplicity.
Ingredients
- 1 ¼ cups heavy cream
- 1 ¼ cups whole milk
- ¾ cup granulated sugar
- 4 large eggs
- 1 large egg yolk
- 2 teaspoons vanilla bean paste (or extract)
- ¼ teaspoon salt
- ¼ teaspoon nutmeg (freshly grated or ground)
- 1 deep-dish 9-inch pie crust (homemade or store-bought)
- Egg wash: 1 egg + a splash of milk, beaten
Instructions
- If you're making your own pie dough, let it chill for at least 2 hours—overnight is even better. Roll it out, fit it into a 9-inch deep dish pie pan, and refrigerate for 30 minutes.
Preheat your oven to 425°F (220°C). - Line the chilled crust with parchment paper and fill it to the top with baking beans or rice to prevent shrinking. Bake for 15–18 minutes, until the edges just begin to turn golden.
- Lower the oven temperature to 375°F (190°C), remove the beans and parchment, and brush the bottom with a thin layer of egg wash. Return to the oven for another 5–7 minutes, just until the base looks dry and lightly golden. Set aside to cool.
- Adjust oven temperature to 325°F (160°C).
- In a large bowl, gently whisk together the eggs, extra yolk, sugar, and salt—just until combined, without whipping in air.
- In a saucepan, combine cream, milk, and vanilla. Warm over medium-low heat until steaming and just starting to bubble around the edges (don’t let it boil).
- Very slowly pour a small amount of the warm milk mixture into the eggs, whisking constantly to temper. Continue gradually adding the milk until fully incorporated.
- Strain the custard through a fine mesh sieve into a clean bowl to remove any bits of cooked egg.
- Pour the smooth custard into your cooled crust. Lightly dust the surface with nutmeg and, if desired, brush the outer edge of the crust with more egg wash for a golden finish.
- Bake on the middle rack for 40–50 minutes. The outer edges should be set while the center should still have a gentle wobble when nudged.
- Allow the pie to cool completely at room temperature, then refrigerate for at least 4 hours (overnight is best) before slicing.
Notes
- Homemade pie dough adds a wonderful flaky texture, but store-bought works in a pinch. Just make sure it's a deep-dish crust.
- To prevent over-browning, cover the crust edges with a pie shield if needed during baking.
- For the best texture, don’t rush the tempering process—slowly combining the hot milk with eggs is key.
Nutrition Information
Yield
8Serving Size
1Amount Per Serving Calories 394Total Fat 25gSaturated Fat 13gTrans Fat 0gUnsaturated Fat 10gCholesterol 232mgSodium 247mgCarbohydrates 33gFiber 1gSugar 23gProtein 9g
TastyFitnessRecipes.com, occasionally offers nutritional information for recipes contained on this site. This information is provided as a courtesy and is an estimate only. This information comes from online calculators. Although tastyfitnessrecipes.com attempts to provide accurate nutritional information, these figures are only estimates.
FAQ
Can I use a store-bought crust?
Absolutely. It’s a great shortcut, and no one will know unless you tell them.
What temperature should I bake it at?
Start with a high temp for the crust, then lower it for the custard bake. The filling itself bakes at 325°F.
Do I really need to scald the milk?
I think it’s worth the few extra minutes. It makes a big difference in texture and flavor.
Is this like an old-fashioned egg custard pie?
Yes—this is the classic dessert you remember, just with some extra tips to make sure it comes out perfect every time.