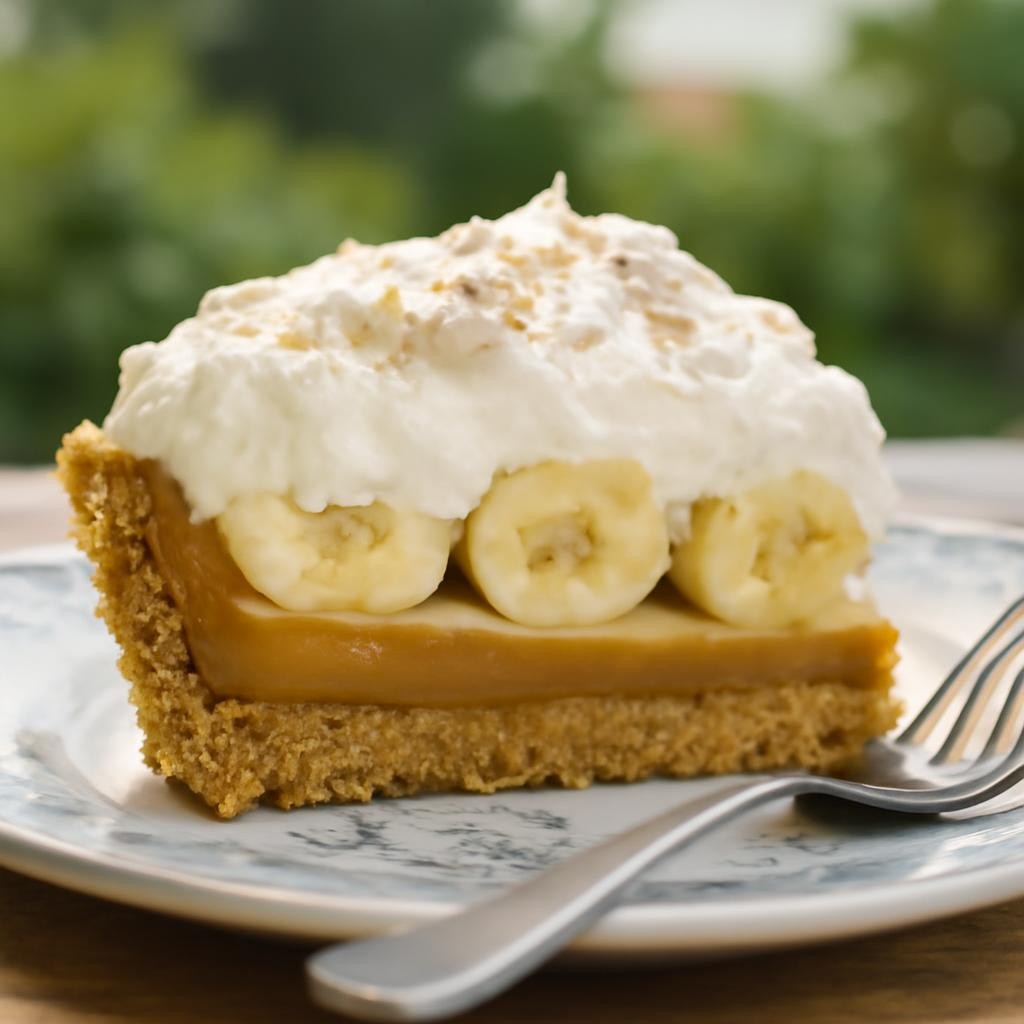
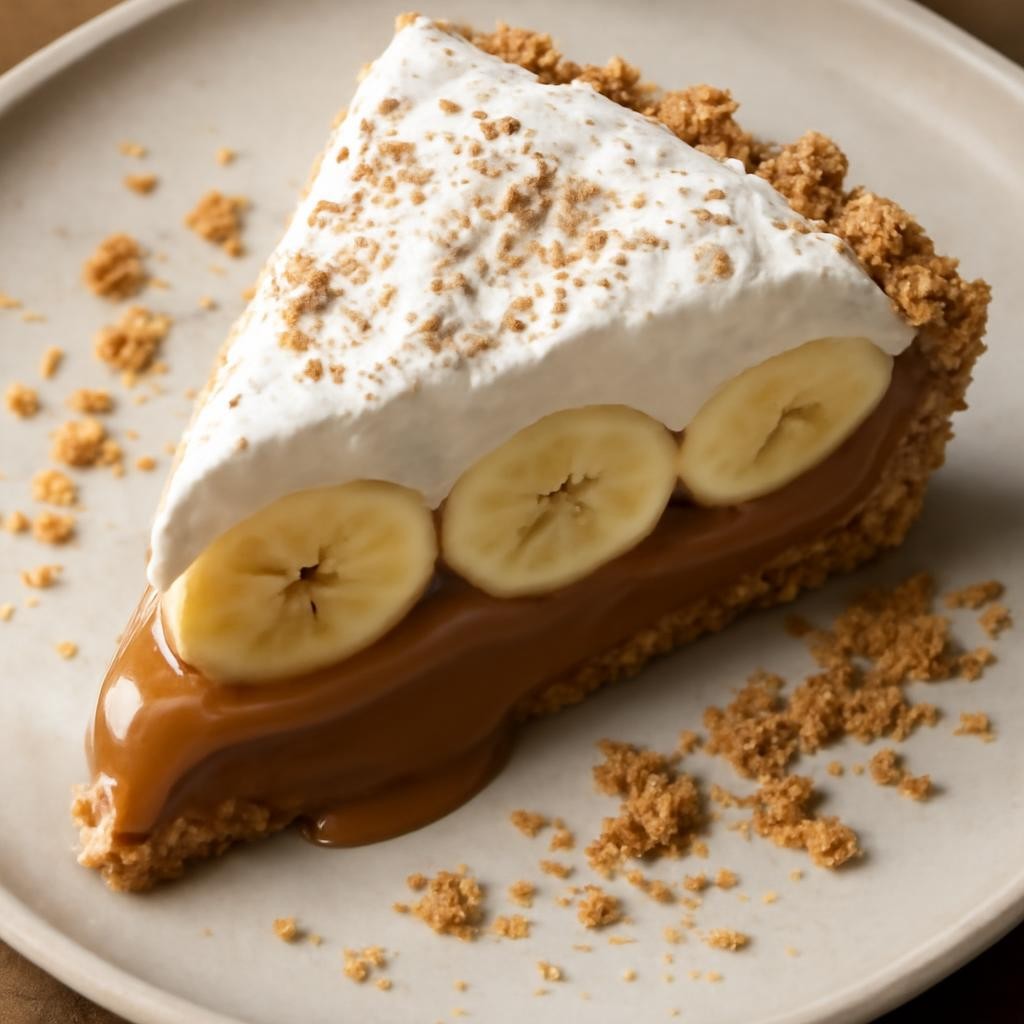
Banoffee Pie is a delightful dessert that combines the rich flavors of bananas, creamy toffee, and a buttery biscuit crust, creating a deliciously indulgent treat that is hard to resist. This no-bake dessert is perfect for any occasion, from casual family dinners to elegant gatherings. With its delightful layers of flavor and texture, banoffee pie is sure to impress your friends and family, making it a beloved classic in many households.

Why You Will Love This Recipe
You will adore this banoffee pie recipe for its incredible balance of flavors and ease of preparation. The sweet, caramel-like toffee pairs beautifully with the fresh bananas, while the whipped cream adds a lightness that makes this dessert feel indulgent yet not overly heavy. This recipe is straightforward, requiring no baking and minimal cooking skills, making it accessible for both novice and experienced bakers alike. It’s also a fantastic option for those looking for a gluten-free dessert, as the crust can easily be made with gluten-free biscuits. Overall, it’s a crowd-pleaser that satisfies sweet cravings without demanding hours in the kitchen.
Tips and Tricks
- To make the toffee filling, use sweetened condensed milk and cook it gently. If you have a slow cooker, you can place a can of sweetened condensed milk in the cooker with water and let it cook on low for 8 hours, resulting in a perfectly creamy toffee.
- For a more intense flavor, consider adding a splash of vanilla extract to the whipped cream before whipping. This enhances the overall taste of the pie.
- Use ripe but firm bananas to ensure they hold their shape and don’t become mushy in the pie.
- If you want a touch of saltiness to balance the sweetness, sprinkle a pinch of sea salt over the toffee layer before adding the bananas.
Make Ahead Tips
You can prepare several components of the banoffee pie ahead of time. The toffee filling can be made a day or two in advance and stored in the refrigerator. The crust can also be prepped ahead; just make sure to store it in an airtight container. When ready to serve, simply layer the bananas and whipped cream on top, and your pie will be ready to impress. As for how long it stays fresh, the assembled pie is best enjoyed within 24 hours, but the individual components can last up to 3 days in the fridge.
Recipe Variations
Feel free to get creative with your banoffee pie! For a tropical twist, consider adding a layer of coconut cream or toasted coconut flakes. If you prefer a nutty flavor, you can use almond or hazelnut biscuits for the crust. For a chocolatey version, sprinkle some grated chocolate or cocoa powder on top of the whipped cream. You could also add a layer of peanut butter for a rich and creamy flavor that pairs beautifully with the bananas and toffee.
How to Serve
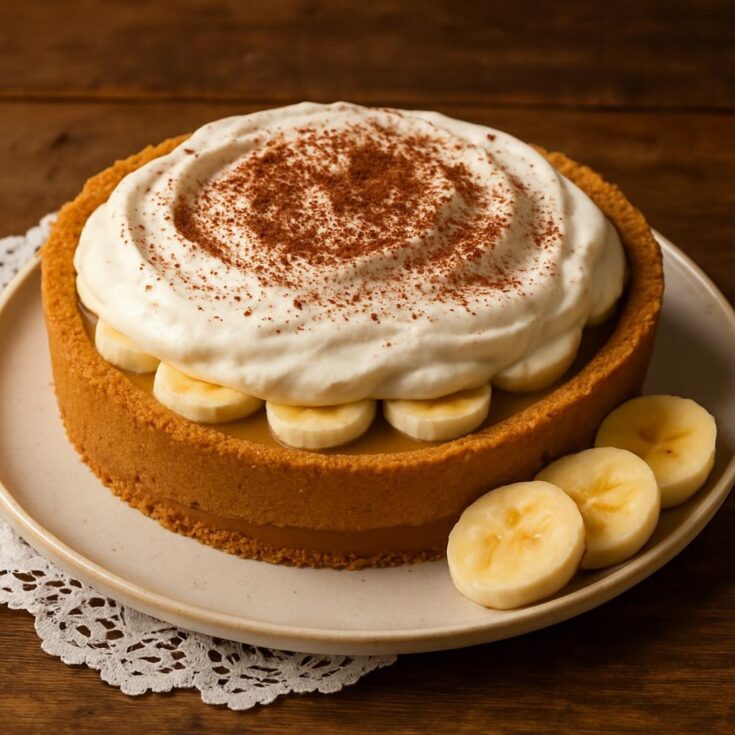
To serve your banoffee pie, slice it into wedges and arrange them on a beautiful dessert plate. A drizzle of additional toffee sauce or a dusting of cocoa powder can elevate the presentation. Garnish with a few banana slices or a sprig of fresh mint for a pop of color. Serve chilled, and consider offering extra whipped cream on the side for those who want an additional dollop.
Pairing Suggestions
Pair your banoffee pie with a refreshing cup of coffee or a rich cappuccino for a delightful dessert experience. For those who prefer something a little stronger, a dark rum or spiced rum cocktail can complement the sweetness of the pie beautifully. If you’re looking for a non-alcoholic option, a chilled glass of iced tea with lemon would contrast nicely with the sweetness of the dessert.
How to Store
To store leftovers, cover the pie with plastic wrap and keep it in the refrigerator. It’s best consumed within 24 hours for optimal freshness. If you have leftover components, such as the crust or toffee, store them separately. The crust can be frozen for up to a month, and the toffee will last in the fridge for a week. Just be sure to reassemble the pie shortly before serving for the best results.
Equipment Needed
You will need a few basic kitchen tools to make this banoffee pie. A 9-inch pie dish is essential for holding the layers together. You will also need a mixing bowl for whipping cream, a saucepan for making the toffee, and a food processor or rolling pin to crush the biscuits for the crust. If you prefer, you can use pre-made whipped cream to save time.

Dietary Adaptations
To make a vegan version of the banoffee pie, simply substitute the sweetened condensed milk with coconut cream or a vegan caramel sauce. Use vegan biscuits for the crust and replace regular whipped cream with whipped coconut cream or a store-bought dairy-free option. For those with nut allergies, ensure your biscuit choice is nut-free and avoid any nut toppings.
Seasonal Adaptations
While bananas are available year-round, you can adjust the recipe based on seasonal fruits. In the summer, consider adding fresh berries on top for a burst of color and flavor. In the fall, a sprinkle of cinnamon can enhance the toffee and banana flavors, making for a lovely autumn-inspired dessert.
Recipe FAQs
- Can I use a different base instead of biscuits? Yes, you can use graham crackers or a gluten-free alternative. Just make sure to adjust the quantity of butter accordingly.
- How long does it take to prepare? The entire preparation time is about 30 minutes, with additional chilling time for the pie.
- Can I use caramel sauce instead of making toffee? Absolutely! Store-bought caramel can save time, but homemade toffee offers a richer flavor.
- What if I don’t have a pie dish? You can use any shallow dish or tart pan to create a similar effect.
Banoffee Pie
Banoffee Pie is a delightful dessert that combines the rich flavors of bananas, creamy toffee, and a buttery biscuit crust, creating a deliciously indulgent treat that is hard to resist.
Ingredients
- 250g digestive biscuits (or gluten-free biscuits)
- 125g unsalted butter, melted
- 1 can (397g) sweetened condensed milk
- 2 large ripe bananas, sliced
- 300ml heavy cream
- 2 tablespoons powdered sugar
- 1 teaspoon vanilla extract
- Grated chocolate or cocoa powder for garnish (optional)
Instructions
- Make the Crust: Crush the digestive biscuits into fine crumbs using a food processor or by placing them in a zip-lock bag and rolling over them with a rolling pin. Mix the crumbs with melted butter until well combined. Press the mixture into the bottom and up the sides of a 9-inch pie dish. Chill in the fridge for about 30 minutes.
- Prepare the Toffee: In a saucepan, place the can of sweetened condensed milk. Cook over low heat, stirring constantly, for about 20-25 minutes until it thickens and turns a golden caramel color. Alternatively, use the slow cooker method mentioned earlier. Allow it to cool slightly.
- Assemble the Pie: Once the crust is set, pour the toffee filling into the crust and spread it evenly. Layer the sliced bananas on top of the toffee.
- Whip the Cream: In a mixing bowl, whisk together the heavy cream, powdered sugar, and vanilla extract until soft peaks form. Spread the whipped cream over the bananas.
- Garnish: If desired, sprinkle grated chocolate or cocoa powder over the whipped cream for decoration.
- Chill: Place the assembled pie back in the fridge for at least 2 hours to set before serving.
Nutrition Information
Yield
8Serving Size
1Amount Per Serving Calories 456Total Fat 34gSaturated Fat 20gTrans Fat 1gUnsaturated Fat 11gCholesterol 81mgSodium 103mgCarbohydrates 35gFiber 2gSugar 23gProtein 4g
TastyFitnessRecipes.com, occasionally offers nutritional information for recipes contained on this site. This information is provided as a courtesy and is an estimate only. This information comes from online calculators. Although tastyfitnessrecipes.com attempts to provide accurate nutritional information, these figures are only estimates.
Final Thoughts
Banoffee pie is a delightful dessert that combines simple ingredients to create a complex flavor experience. It’s a perfect choice for gatherings or a sweet treat at home. With its rich layers and light whipped cream topping, every bite is a true indulgence. Plus, with the tips and variations provided, you can customize this dessert to suit your taste or dietary needs. So gather your ingredients, roll up your sleeves, and treat yourself to this classic dessert that’s sure to become a favorite!