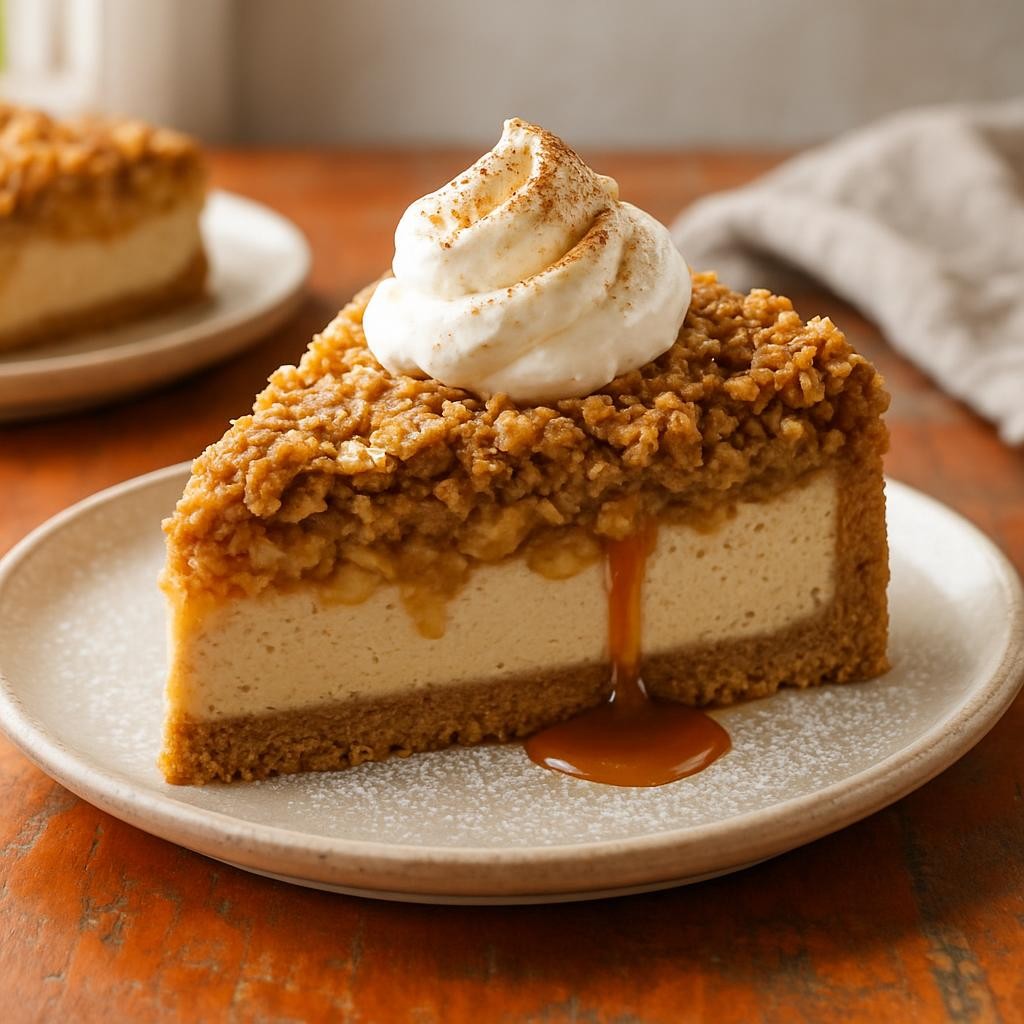
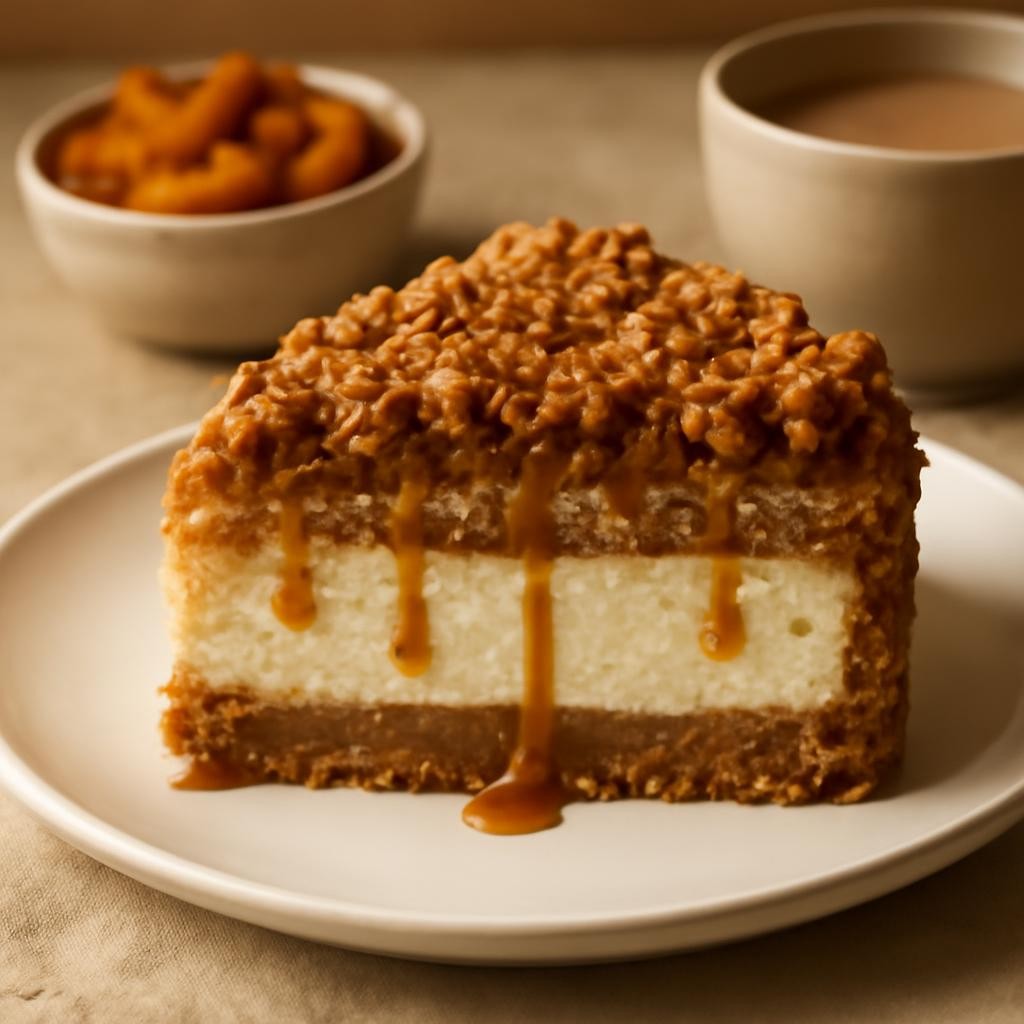
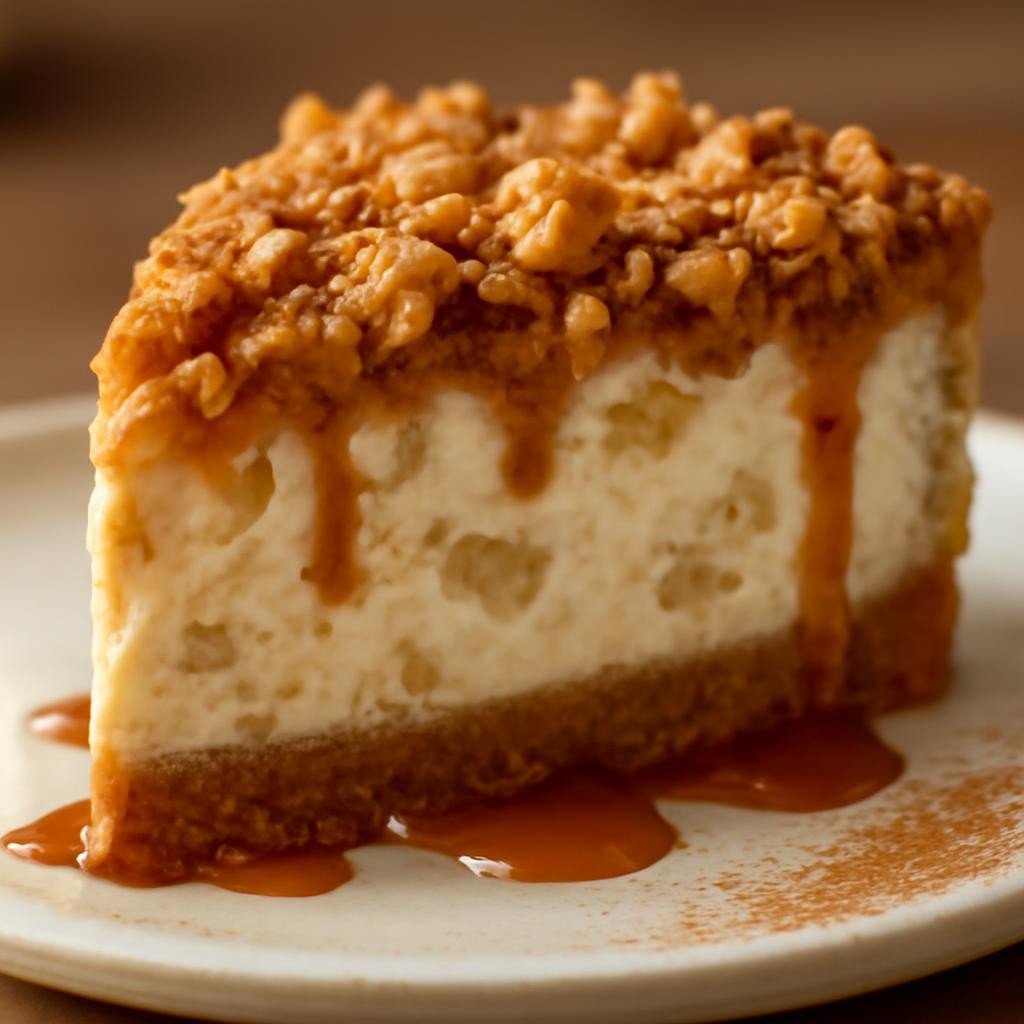
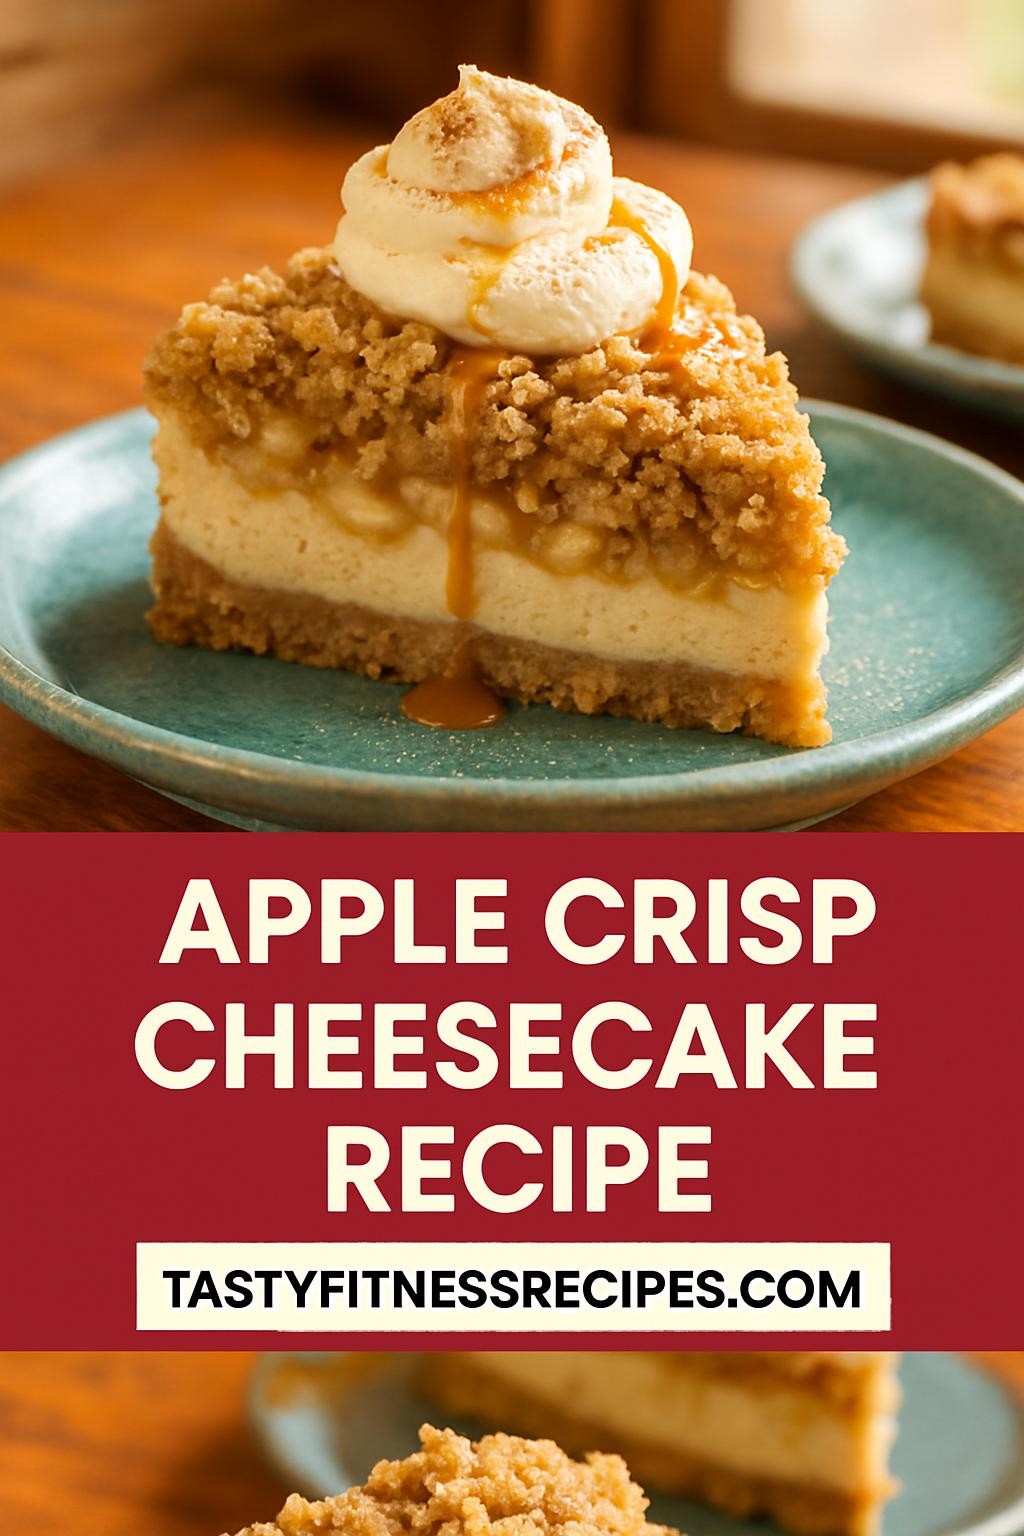
Indulge in a delightful fusion of flavors with this Apple Crisp Cheesecake recipe. Combining the creamy richness of cheesecake with the warm, comforting notes of spiced apple crisp, this dessert is perfect for any occasion. The buttery oat topping contrasts beautifully with the smooth cheesecake filling, making each bite a heavenly experience that will leave your taste buds dancing with joy.
Why You Will Love This Recipe
You’ll love this Apple Crisp Cheesecake because it harmoniously blends two beloved desserts into one irresistible treat. The luscious cheesecake filling is infused with a hint of cinnamon and vanilla, perfectly complementing the sweet, tart apples. Not only is it incredibly delicious, but it’s also surprisingly easy to make, even for novice bakers. Plus, it fits well into various lifestyles, being a crowd-pleaser at gatherings while offering comforting flavors that evoke nostalgia with every bite.
Tips and Tricks
To make your Apple Crisp Cheesecake even more delightful, consider these tips and tricks:
- Use room temperature cream cheese for a smoother filling that blends easily without lumps.
- For a richer flavor, toss the apples in a bit of lemon juice before adding sugar and spices to enhance their brightness.
- If you’re short on time, you can use store-bought apple pie filling instead of making it from scratch.
- For added depth, sprinkle a bit of nutmeg along with the cinnamon in the apple mixture.
Make Ahead Tips
Perfect for busy bakers, you can make various components of this cheesecake in advance:
- The crust can be prepared a day ahead and stored in the refrigerator.
- The apple filling can be made and cooled a day in advance, allowing the flavors to meld beautifully.
- Once baked, the cheesecake can be stored in the refrigerator for up to three days, making it ideal for gatherings or meal prepping.
Recipe Variations
Get creative with these variations for your Apple Crisp Cheesecake:
- Swap out the apples for pears or peaches for a different fruity twist.
- For a caramel flavor, drizzle caramel sauce over the apple filling before adding the cheesecake layer.
- If you prefer a nutty crunch, add chopped walnuts or pecans to the oat topping.
- To make it gluten-free, substitute regular flour with almond flour or gluten-free all-purpose flour.
How to Serve
Serving your Apple Crisp Cheesecake is all about presentation:
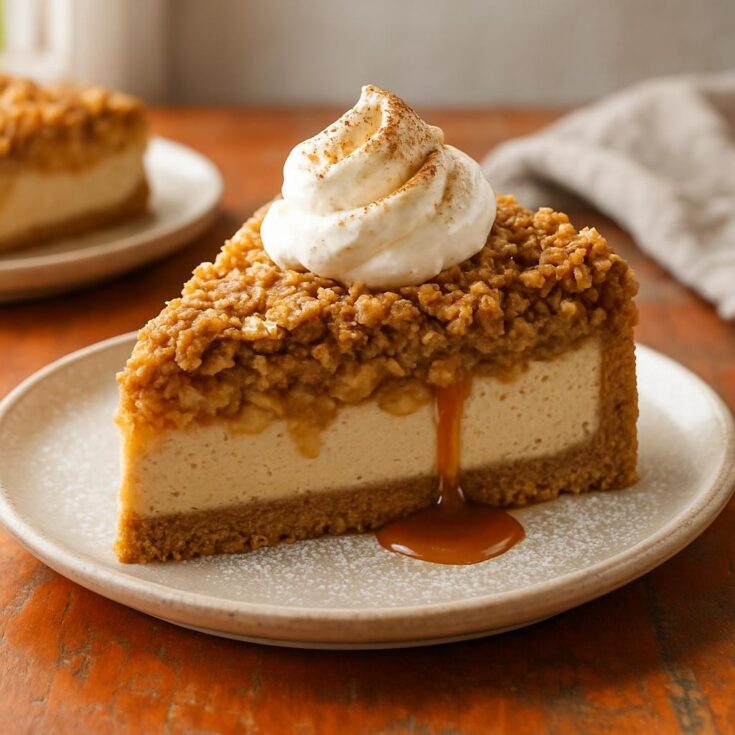
- Slice the cheesecake into generous portions and place them on a dessert plate.
- Garnish with a dollop of whipped cream and a sprinkle of cinnamon for an elegant touch.
- For an extra indulgent experience, serve it with a scoop of vanilla ice cream on the side.
- A drizzle of caramel sauce over the top elevates the dish, making it visually appealing.
Pairing Suggestions
Elevate your dessert experience with these pairing suggestions:
- Serve it with a cup of spiced chai tea for a comforting flavor combination.
- A sweet dessert wine, such as Moscato, complements the spiced apples beautifully.
- For a fun twist, pair it with a spiced cider cocktail or a cinnamon-infused whiskey.
- If you’re feeling adventurous, a scoop of salted caramel ice cream pairs wonderfully with the cheesecake.
How to Store
To keep your Apple Crisp Cheesecake fresh:
- Store leftovers in an airtight container in the refrigerator for up to 5 days.
- If you’d like to freeze it, wrap slices tightly in plastic wrap and then foil to prevent freezer burn. It can be frozen for up to 3 months.
- To reheat, thaw in the refrigerator overnight, then warm individual slices in the microwave for about 15-20 seconds.
Equipment Needed
You’ll need a few essential kitchen tools for this recipe:
- A 9-inch springform pan for easy removal of the cheesecake.
- A mixing bowl and electric mixer for the filling.
- A sharp knife for slicing apples and the finished cheesecake.
- A baking sheet for catching any drips while baking.
Dietary Adaptations
For those with dietary restrictions, consider these adaptations:
- To make it vegan, use plant-based cream cheese and a flaxseed meal mixture as a substitute for eggs.
- For a dairy-free option, choose coconut cream or nut-based cream cheese.
- To make it nut-free, ensure your oat topping is made with certified gluten-free oats and avoid nuts in the recipe.
- For a lower sugar version, you can use a sugar substitute like erythritol in the cheesecake filling and the apple mixture.
Seasonal Adaptations
Embrace seasonal ingredients with these adaptations:
- In the fall, use freshly picked apples and add a touch of maple syrup for a seasonal twist.
- In the winter, consider adding spices like ginger and cloves to warm up the flavors.
- In the summer, swap apples for fresh berries for a lighter, fruitier dessert.
Recipe FAQs
Here are some frequently asked questions about making Apple Crisp Cheesecake:
- Can I use frozen apples? Yes, just ensure they’re thawed and drained well before using to avoid excess moisture.
- How do I prevent the cheesecake from cracking? Bake it in a water bath to help maintain even temperature and moisture.
- What if my cheesecake is too soft? It may need more chilling time; ensure it has cooled completely before serving.
Apple Crisp Cheesecake
Indulge in a delightful fusion of flavors with this Apple Crisp Cheesecake recipe. Combining the creamy richness of cheesecake with the warm, comforting notes of spiced apple crisp, this dessert is perfect for any occasion.
Ingredients
- For the crust:
- 1 ½ cups graham cracker crumbs
- ½ cup unsalted butter, melted
- ¼ cup sugar
- For the apple filling:
- 4 cups peeled and diced apples (such as Granny Smith)
- ½ cup brown sugar
- 1 teaspoon cinnamon
- 1 tablespoon lemon juice
- For the cheesecake filling:
- 16 ounces cream cheese, softened
- 1 cup granulated sugar
- 1 teaspoon vanilla extract
- 3 large eggs
- 1 teaspoon all-purpose flour (optional for thickening)
- For the crisp topping:
- 1 cup rolled oats
- ½ cup brown sugar
- ½ cup all-purpose flour
- ½ teaspoon cinnamon
- ½ cup unsalted butter, melted
Instructions
- Preheat your oven to 325°F (160°C).
- Prepare the crust: In a mixing bowl, combine graham cracker crumbs, melted butter, and sugar until well combined. Press the mixture firmly into the bottom of a 9-inch springform pan. Bake for 10 minutes, then remove and let cool.
- Make the apple filling: In a large bowl, toss the diced apples with brown sugar, cinnamon, and lemon juice. Set aside.
- Prepare the cheesecake filling: In another bowl, beat the softened cream cheese until smooth. Gradually add sugar and vanilla, mixing until well combined. Add eggs one at a time, mixing gently after each addition. If desired, stir in flour for thickness.
- Assemble the cheesecake: Pour half of the cheesecake filling into the cooled crust. Layer the apple mixture evenly over the filling. Pour the remaining cheesecake filling on top of the apples.
- Make the crisp topping: In a separate bowl, mix rolled oats, brown sugar, flour, cinnamon, and melted butter until crumbly. Sprinkle the topping evenly over the cheesecake.
- Bake the cheesecake: Place the springform pan on a baking sheet and bake for 60-70 minutes, or until the edges are set, and the center is slightly jiggly.
- Cool and chill: Remove from the oven and allow it to cool at room temperature for at least 1 hour. Then refrigerate for at least 4 hours or overnight before serving.
- Serve: Slice and serve with whipped cream, caramel drizzle, or ice cream as desired.
Nutrition Information
Yield
12Serving Size
1Amount Per Serving Calories 591Total Fat 34gSaturated Fat 19gTrans Fat 0gUnsaturated Fat 13gCholesterol 131mgSodium 251mgCarbohydrates 67gFiber 3gSugar 48gProtein 7g
TastyFitnessRecipes.com, occasionally offers nutritional information for recipes contained on this site. This information is provided as a courtesy and is an estimate only. This information comes from online calculators. Although tastyfitnessrecipes.com attempts to provide accurate nutritional information, these figures are only estimates.
Final Thoughts
Making this Apple Crisp Cheesecake is a rewarding experience that results in a dessert that is as impressive as it is delicious. With its beautiful layers and delightful flavors, it’s sure to become a favorite in your dessert repertoire. Whether for a special occasion or a cozy night in, this recipe brings the comfort of classic desserts right to your table. So gather your ingredients, and let the baking magic begin!