As someone who’s been through a LOT of weeknight baking sessions, I’ll admit: there’s nothing quite as reliable as a good old box of brownie mix waiting on my pantry shelf. Over time, I started seeing that with a few small tweaks, those brownies could easily hold their own next to anything made from scratch. Let me share what’s worked in my own kitchen, and a few stories from real life when these brownies have absolutely saved the day.

Why Boxed Brownies Are a Lifesaver
Let’s be real—sometimes, all you want is chocolate in a hurry, and boxed brownies have come to my rescue countless times. I remember hosting a last-minute movie night, scrambling for dessert, and a box mix turned to pure magic once I used these tricks. No one believed they weren’t homemade! Friends now specifically request “those brownies” whenever we get together.
Easy Tweaks That Make All the Difference
After a little experimenting (and a few late-night test batches!), here’s how I make a box of brownie mix taste bakery-level:
Melted Butter, Every Time
I always swap the oil for melted butter. It gives an extra richness. The first time I made this change, everyone asked what “secret ingredient” was making the brownies taste so good.
Buttermilk or Whole Milk Swap
Instead of water, I pour in buttermilk or whole milk. It helps the brownies turn out denser and more like something you’d buy at a good bakery. Buttermilk gives a slight tang that balances the chocolate.
Extra Cocoa for Chocolate Lovers
A spoonful of unsweetened cocoa powder gets stirred in with the mix. This trick came from a family gathering; my cousin said the brownies “tasted like a midnight snack at a fancy café.”
Espresso Powder = Next-Level Flavor
Even if you’re not a coffee fan, a pinch of espresso powder brings out the chocolate in an incredible way. Don’t worry—the brownies won’t taste like coffee. My skeptical uncle is now a total convert.
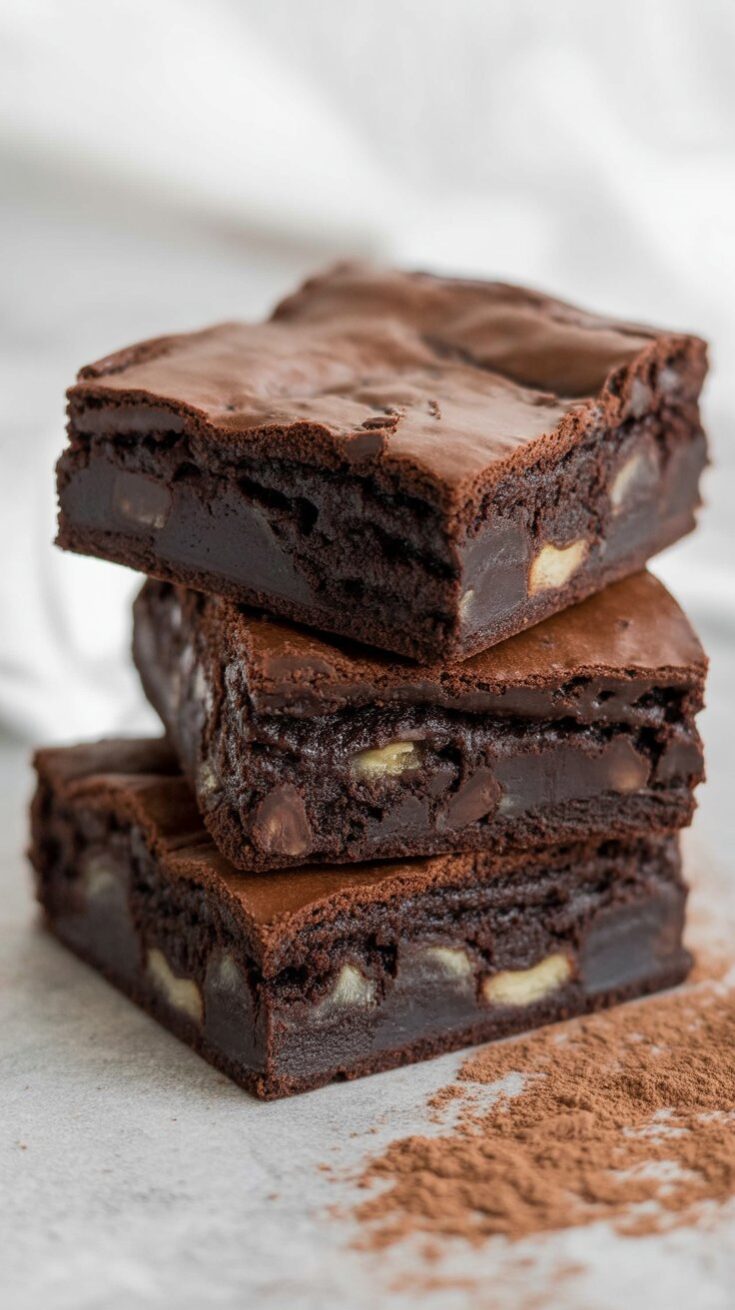
Chocolate Chips for Texture
I toss in a hearty handful of good chocolate chips, usually dark, because I love a bit of molten chocolate in the mix. Semi-sweet works too. Sometimes, I’ll even throw in chopped bits of a chocolate bar lurking in the cupboard.
Mixing It All Up — The Lazy Way
Here’s a tip from many whirlwind evenings: dump all your ingredients into one bowl. No fussy steps. Use an electric mixer for just a minute—this ensures everything gets mixed without overworking the batter. It’s my go-to when I’m short on time or baking with kids.
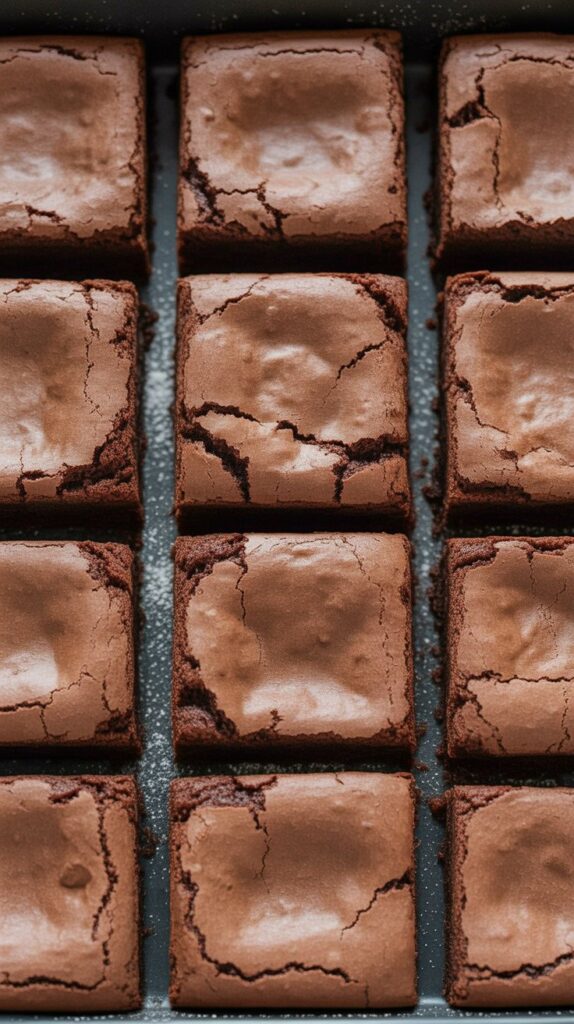
Getting the Fudgy Texture and Shiny Top
- Eggs: Stick to two eggs for classic, fudgy brownies.
- Extra Yolk: For ultra-rich brownies, add one extra egg yolk.
- Don’t Overbake: Pull them out the moment a toothpick comes out with a few moist crumbs. The center will set as it cools, trust me!

Baker’s Pans and How They Matter
I use a glass pan most of the time—it’s what I grew up with and what I have handy. If you use a metal one, shorten the baking time. Metal heats up faster and can make brownies bake quicker and end up chewier.
Add-Ins to Make Them Your Own
Here’s where you get to play. Crowd favorites at my house have been:
- Nuts: Walnuts or pecans add great crunch
- Swirls: Peanut butter, Nutella, or even cream cheese rippled across the top
- Mints: Chopped mint candies make them perfect for special occasions
- Goodies Galore: Toss chopped chocolate bars, candy pieces, or even a sprinkle of sea salt over the top before baking
Cutting and Storing Brownies Like a Pro
Clean Edges, Every Time:
Pop your baked brownies in the fridge for half an hour before slicing. Use a big kitchen knife, and wipe it clean between cuts. The first time I tried this, I couldn’t believe the difference—it looked like something from a bakery display.
Storing for Later:
Once cooled, I wrap brownies tightly in foil or store in an airtight container. They taste best the day after baking—the flavors settle in and the texture gets even fudgier.
Freezing Tip:
If you want to keep some for another day (or hide them for emergency chocolate cravings), wrap portions and freeze. Just thaw overnight in the fridge, and they’re as good as fresh.
Tried-and-Tested Variations
- 9×13 Inch Pan:
If you’re baking for a crowd, this works well. The brownies will be a bit thinner, or you can double the recipe for a thick, indulgent batch. Just extend the baking time and check with a toothpick. - Fun Toppings:
Serve warm brownies with a scoop of vanilla ice cream—my idea of a perfect treat, especially after a backyard barbecue. Or add a drizzle of caramel sauce, a few fresh berries, or a dollop of whipped cream.
Brownies Box
There's something magical about taking a simple box of brownie mix and turning it into a dessert that tastes completely homemade. This upgraded version is a beloved staple in my kitchen—rich, chewy, and deeply chocolatey with a few simple add-ins that make all the difference. Whether you're baking for a weeknight treat or serving to guests, no one will guess these started from a box.
Ingredients
- ½ cup (113g) unsalted butter, melted
- ⅓ cup (79ml) buttermilk or regular milk
- 2 large eggs
- 18.3 oz box brownie mix (anything in the 18–18.4 oz range works well)
- ¼ cup unsweetened cocoa powder
- 1 tsp espresso powder (optional – enhances the chocolate flavor without a coffee taste)
Instructions
- Start by preheating your oven to 350°F. Line an 8×8-inch square baking pan with parchment paper, making sure it hangs over the edges slightly for easy lifting later. Lightly mist it with non-stick spray.
- In a large mixing bowl, whisk together the melted butter and eggs until well blended. Pour in the buttermilk (or milk) and stir again. Add in the brownie mix, cocoa powder, and espresso powder (if using), then mix with a hand mixer on low speed just until everything is combined and smooth—about one minute should do it.
- Scrape the thick, chocolatey batter into your prepared pan and smooth the top with a spatula.
- Bake for 37–40 minutes, or until a toothpick inserted near the center comes out with a few moist crumbs. Let the brownies cool completely in the pan.
- Once cool, lift them out using the parchment paper, slice into squares, and try not to eat them all at once.
Notes
- Want to bake these in a 9×13-inch pan? Go for it—but shorten the bake time to around 25–32 minutes. They’ll be thinner but just as delicious.
- Metal pans conduct heat more quickly than glass. If using a metal pan, start checking your brownies 5 minutes earlier.
- Stir in ¾ to 1 cup of your favorite mix-ins like chocolate chips, chopped nuts, peanut butter chips, or even caramel bits to customize them your way.
Nutrition Information
Yield
12Serving Size
1Amount Per Serving Calories 214Total Fat 8gSaturated Fat 2gTrans Fat 0gUnsaturated Fat 6gCholesterol 33mgSodium 150mgCarbohydrates 35gFiber 0gSugar 0gProtein 3g
TastyFitnessRecipes.com, occasionally offers nutritional information for recipes contained on this site. This information is provided as a courtesy and is an estimate only. This information comes from online calculators. Although tastyfitnessrecipes.com attempts to provide accurate nutritional information, these figures are only estimates.
Everyday Brownie FAQ
How do I know when they’re done?
Look for set edges and a shiny, crackled top. The center should still wobble slightly when you take them out—trust your nose and that toothpick test.
Can I freeze brownies?
Absolutely! The trick is to wrap well to keep them from drying out.
What’s your favorite mix-in?
It’s always changing, but peanut butter swirls and dark chocolate chunks win most often at my place.
There’s nothing more satisfying than watching a tray of brownies disappear, square by square, whether it’s at a family picnic or a quiet evening at home. These simple hacks have made box brownies my not-so-secret weapon, so give them a try and watch your “homemade” reputation soar!
Try other Brownies recipes: