If you love those bakery-style chocolate chip cookies with that perfect balance of crispy edges and soft, gooey centers, you’re going to want to bookmark this recipe. I’ve baked these cookies more times than I can count, and they’ve become my go-to when I want something guaranteed to impress.

Whenever I make them, the kitchen fills with that deep, buttery aroma, and somehow everyone seems to wander in just as they’re coming out of the oven. There’s just something about a fresh chocolate chip cookie that feels like home.
Reasons You’ll Love These Cookies
If you’re a fan of soft-baked cookies, you’re in for a treat. These have that pillowy texture that feels so comforting with every bite. I’ve served these at everything from kids’ sleepovers to grown-up dinner parties, and they always disappear fast.
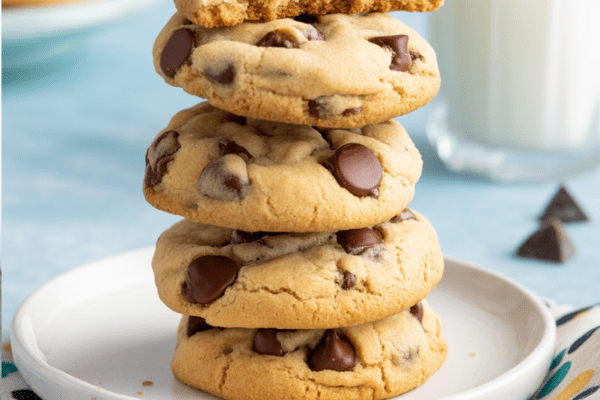
Beyond the taste, they’re beautiful cookies—golden, slightly cracked on top, with plenty of chocolate peeking through. They’re the kind of cookies you’re proud to bring to a potluck or wrap in a box as a gift.
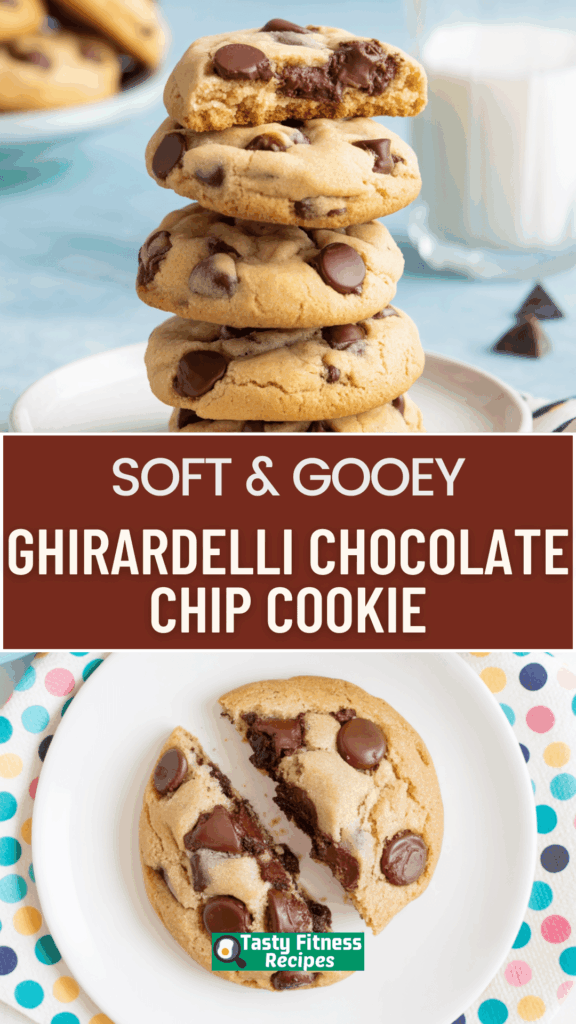
For chocolate lovers, these are packed with Ghirardelli chocolate chips. There’s no hunting around for the chocolate here—you’ll get it in every bite.
And yes, melting the butter and chilling the dough takes a little extra time, but it’s so worth it. That step creates a richer, deeper flavor that elevates these cookies far beyond your average batch. It’s the kind of thing you do once and never skip again.
Ghirardelli Chocolate Chip Cookie Recipe
I’m always on the hunt for new chocolate chip cookie recipes to try, but this one really stands out. It nails that perfect trifecta of flavor, texture, and looks.
When I want to spoil my family or make something special for friends, this is one of my top choices. It’s got that reliable, crowd-pleasing quality you want in a favorite recipe.
How To Make Ghirardelli Chocolate Chip Cookies
These cookies use familiar pantry ingredients, but with a couple of clever tweaks that make them special. I always keep these ingredients on hand because you just never know when the mood for cookies will strike.
I find it relaxing to make these—melting the butter, mixing everything by hand at the end so you don’t overwork the dough. It’s the kind of baking that feels rewarding without being stressful.
If you’re making these for the first time, just take it step by step and don’t rush it. The results speak for themselves.
Try other cookie recipes:
Ingredients
Butter – You can use salted or unsalted. I tend to grab salted because I love that sweet-salty combo. Don’t worry about softening it—here you melt it, which makes prep easy, especially if you forgot to set it out ahead of time.
Granulated Sugar – Standard white sugar gives that classic sweetness and helps with the structure.
Brown Sugar – I’m partial to dark brown sugar because it adds this lovely molasses-y richness. If you like that deeper, caramel-like flavor, go for dark.
Eggs – You’ll use one whole egg plus an extra yolk for chewiness. I try to remember to let them come to room temperature. If I forget, I’ll just set them in warm water for a few minutes.
Vanilla Extract – Always pure vanilla if you can. It makes such a difference.
All-Purpose Flour – This is one place people go wrong. Don’t scoop straight from the bag. I fluff it up first, spoon it into the cup, and level it off. Too much flour makes for dry cookies.
Baking Soda – Fresh baking soda is important. I always give mine a quick check so I’m not using something that’s been sitting open in the fridge for months.
Kosher Salt – I love using Kosher or sea salt. It balances the sweetness perfectly. If you’re using regular table salt, I usually cut back just a little.
Chocolate Chips – I use Ghirardelli semi-sweet. Their quality is great, and they hold their shape while melting just enough. If you like bolder chocolate, try bittersweet chips. I usually avoid milk chocolate here because it can make the cookies too sweet.
Steps To Making These Cookies
The first big difference with this recipe? Melted butter. No need to cream softened butter forever. I just melt it gently and let it cool a bit so it doesn’t scramble the eggs.
I like to mix the melted butter with the sugars using my hand mixer for a good two minutes. It makes the base smooth and helps dissolve the sugar a bit.
Then I add the egg and the yolk one at a time, mixing until just combined. Vanilla goes in next for that unmistakable aroma.
The dry ingredients—flour, baking soda, salt—get stirred in by hand. This is where I slow down and make sure I don’t overmix. Overworking the dough can make the cookies tough.
Lastly, in go the chocolate chips. I always save a few to press into the tops of the dough balls before baking. It makes them look extra appealing.
Chilling The Dough
Now, I’ll admit, waiting is the hardest part here. But chilling the dough really pays off. It stops the cookies from spreading too much and gives them that thicker, bakery-style texture.
I usually chill it for at least an hour, but overnight is even better. Often I’ll make the dough in the evening, stash it in the fridge, and bake the next day. It’s a nice way to break up the work if you’re busy.
When you’re ready to bake, preheat your oven well. I actually use an oven thermometer because mine runs a little cool. Getting that right temperature is key to perfect edges and centers.
I scoop the dough onto a baking sheet, sometimes rolling them into neat balls if I want that picture-perfect look. Bake them just until the edges are lightly browned—8 to 10 minutes usually does it for me. Don’t overbake! They’ll firm up as they cool.
Storing Cookies – Expert Tips
Once they’re cool (hardest part is waiting), I store them in an airtight container. They stay fresh for days.
One of my favorite tricks? Add a slice of sandwich bread to the container. The cookies stay wonderfully soft while the bread dries out. It even helps revive cookies that have gotten a little too firm.
If you want to freeze them, let them cool completely first. I stack them with parchment in between layers in a container or freezer bag. They’ll last up to three months. When you want one, just let it sit on the counter for a bit. It’s the easiest way to have fresh cookies whenever the craving hits.
Ghirardelli Chocolate Chip Cookie
There’s something timeless about a warm, gooey chocolate chip cookie straight from the oven. With crisp edges, a chewy center, and rich chocolate in every bite, this recipe hits all the right notes.
Ingredients
- 2 cups all-purpose flour
- 1/2 teaspoon kosher salt
- 1/2 teaspoon baking soda
- 3/4 cup unsalted butter
- 2/3 cup packed brown sugar
- 1/3 cup white sugar
- 1 whole egg (room temperature)
- 1 egg yolk (room temperature)
- 1 1/2 teaspoons pure vanilla extract
- 11–12 oz bag of semi-sweet chocolate chips
Instructions
- Start with the butter: Gently melt the butter in a small saucepan over low heat. Once melted, remove from heat and let it cool down for about five minutes.
- Mix the base: In a large bowl, combine the cooled butter with both sugars. Beat the mixture using an electric mixer for about two minutes until it’s smooth and slightly fluffy. Add in the egg, mix well, then add the yolk and beat again. Stir in the vanilla.
- Combine the dry ingredients: In another bowl, whisk together the flour, baking soda, and salt. Gradually stir this dry mix into your wet ingredients in two parts. Use a spatula or wooden spoon to gently fold the mixture—avoid overmixing.
- Add the chocolate: Pour in the chocolate chips and stir until they’re evenly distributed throughout the dough.
- Chill the dough: Cover the bowl tightly and place it in the fridge for at least an hour. If you have time, chilling it overnight deepens the flavor and improves the texture.
- Time to bake: Preheat your oven to 375°F (190°C). Line a baking sheet with parchment paper or leave it ungreased. Scoop out heaping tablespoons of dough, spacing them a few inches apart.
- Bake until golden: Bake for 8 to 10 minutes, just until the edges are golden and the centers look slightly underbaked—they’ll finish setting as they cool.
- Cool and enjoy: Let cookies sit on the baking sheet for two minutes before transferring to a wire rack. Let them cool completely… or sneak a warm one (we won’t tell).
Notes
- Want that bakery-perfect look? Roll the dough into smooth balls before baking.
- For larger cookies, use 2–3 tablespoons of dough and bake 10–15 minutes.
- Store in an airtight container for up to 3 days, or freeze for longer.
Nutrition Information
Yield
28Serving Size
1Amount Per Serving Calories 5511Total Fat 343gSaturated Fat 203gTrans Fat 0gUnsaturated Fat 125gCholesterol 26mgSodium 174mgCarbohydrates 733gFiber 67gSugar 620gProtein 49g
TastyFitnessRecipes.com, occasionally offers nutritional information for recipes contained on this site. This information is provided as a courtesy and is an estimate only. This information comes from online calculators. Although tastyfitnessrecipes.com attempts to provide accurate nutritional information, these figures are only estimates.
If you’ve been searching for that go-to chocolate chip cookie recipe that never disappoints, give this one a try. It’s become a staple in my kitchen, and I hope it will in yours too. Nothing beats the smell of these baking on a cozy afternoon.