This old-fashioned Hershey’s fudge is the kind of treat that brings back memories of cozy holiday evenings, the scent of melting chocolate wafting through the house, and a plate of glossy fudge squares vanishing faster than you can say “just one more.” It’s rich, chocolatey, and melts in your mouth—exactly the way homemade fudge should be.

Why I Always Make This Fudge at Christmas
I’ve been making this fudge for years now, and every December it shows up like clockwork on my holiday treat tray. It started with a version passed down by my uncle—he used to say if you didn’t burn your fingers at least once stirring the sugar, it didn’t count as real fudge!
What I love most? It’s got that silky, creamy texture that reminds you of the good old days, but it’s not overly sweet like some modern versions. Plus, it’s pretty much foolproof once you get the hang of the sugar temperature.
What You’ll Need
Let’s talk ingredients—and trust me, sticking to the good stuff makes a difference.
-
Salted butter – This gives the fudge that deep, buttery base. I’ve tried with unsalted and added salt separately, but honestly, salted butter just rounds it out better.
-
Evaporated milk – Make sure it’s not sweetened condensed. I’ve made that mistake once in a rush and ended up with a sticky mess that never set.
-
Hershey’s bars – This is what gives the fudge its nostalgic flavor. Don’t swap it for fancy chocolate—this is about comfort and tradition.
-
Semi-sweet chocolate chips – These help balance the sweetness from the milk chocolate.
-
Marshmallow crème – This is your texture secret. It makes the fudge smoother and easier to handle.
-
Sugar – Good ol’ white sugar. Be patient while it boils.
 How I Make This Fudge (And You Can Too)
Whenever I make this, I clear my kitchen, put on some music, and give the process my full attention. Here’s how it goes in my kitchen:
-
Prep the Pan
Line a 9×13 baking pan with parchment paper. If I’m feeling fancy, I give it a light grease too, just for easy lifting. -
Get Your Chocolate Base Ready
In a large heatproof mixing bowl, toss in your chocolate chips, broken Hershey’s bar pieces, and marshmallow crème. I usually do this in my stand mixer bowl so I can use the paddle to mix later. -
Start the Sugar Mixture
In a heavy-bottomed pot (I use a 4-quart stainless steel one), melt together the butter, sugar, and evaporated milk over medium heat. Stir constantly—it takes patience, but that’s what makes it smooth. -
Boil to the Right Temperature
Once it’s bubbling, let it boil until the sugar mixture hits 236°F. I always use a candy thermometer for accuracy. If you’re high up in the hills like I am when visiting my folks, don’t forget to reduce the temp by 2 degrees for every 1,000 feet above sea level. -
Combine & Mix
Carefully pour the hot sugar mixture over your chocolate and marshmallow crème. Don’t scrape the pot—just pour. Scraping can introduce unwanted sugar crystals. Mix until smooth and shiny. -
Spread and Cool
Pour into your prepared pan, smooth the top with a spatula, and let it cool completely at room temp. I usually leave mine overnight—trust me, it’s worth the wait. -
Slice and Enjoy
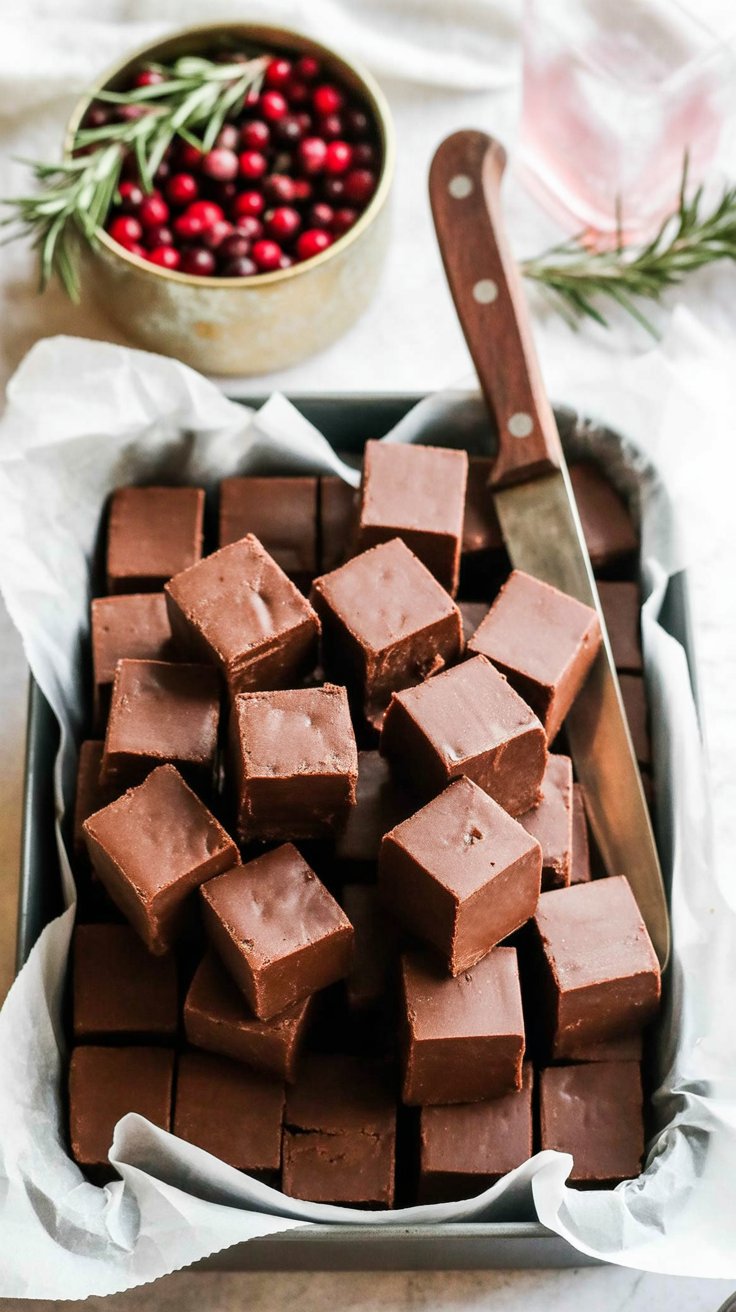
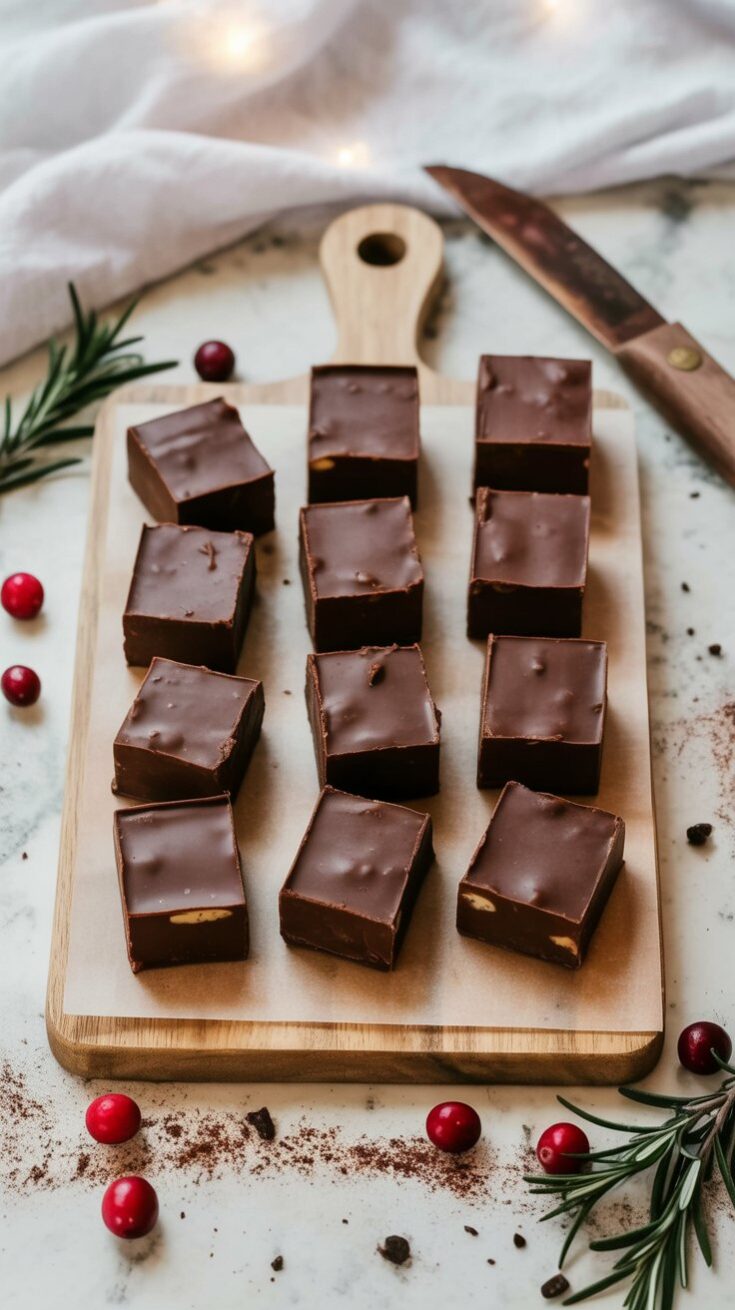
Once set, lift it out and slice into small squares. I like to cut mine bite-sized—makes it easier to sneak “just one” throughout the day.
Fun Twists You Can Try
-
Peanut Butter Swirl: Add a half cup of creamy peanut butter with the marshmallow crème. It turns into a rich peanut butter cup-style fudge.
-
Nuts or No Nuts: Personally, I’m a no-nut guy when it comes to fudge, but if you love a little crunch, stir in some toasted walnuts before setting.
-
Festive Peppermint: Sprinkle crushed candy canes over the top before it cools—it’s a hit during Christmas parties.
-
Chocolate Variations: While I stick to Hershey’s for the nostalgia, you can try dark chocolate chips or even a mix with white chocolate if you’re feeling adventurous.
 How I Store My Fudge (And What Works Best)
I usually keep my fudge in an airtight tin on the counter—it stays soft and perfect for up to a week. If your kitchen runs warm, go ahead and refrigerate it, but let it sit out a bit before eating.
And yes—you can freeze it! Just wrap it tightly (I use parchment and foil) and stash in a container. It holds up for a few months. Great for making ahead during the hectic holiday season.
Tips for the Smoothest Fudge Ever
-
Don’t rush the sugar – Medium heat only, and stir constantly.
-
Use a thermometer – You’ll never regret investing in one. Temperature is everything in candy-making.
-
Skip the scraping – From the pan and the bowl. That’s where sugar crystals lurk.
-
Let it cool naturally – Fudge doesn’t like the fridge when it’s setting. Leave it alone on the counter for a few hours, or better, overnight.
-
Avoid rainy days – Humidity can mess with fudge texture. I learned this the hard way during a monsoon season.
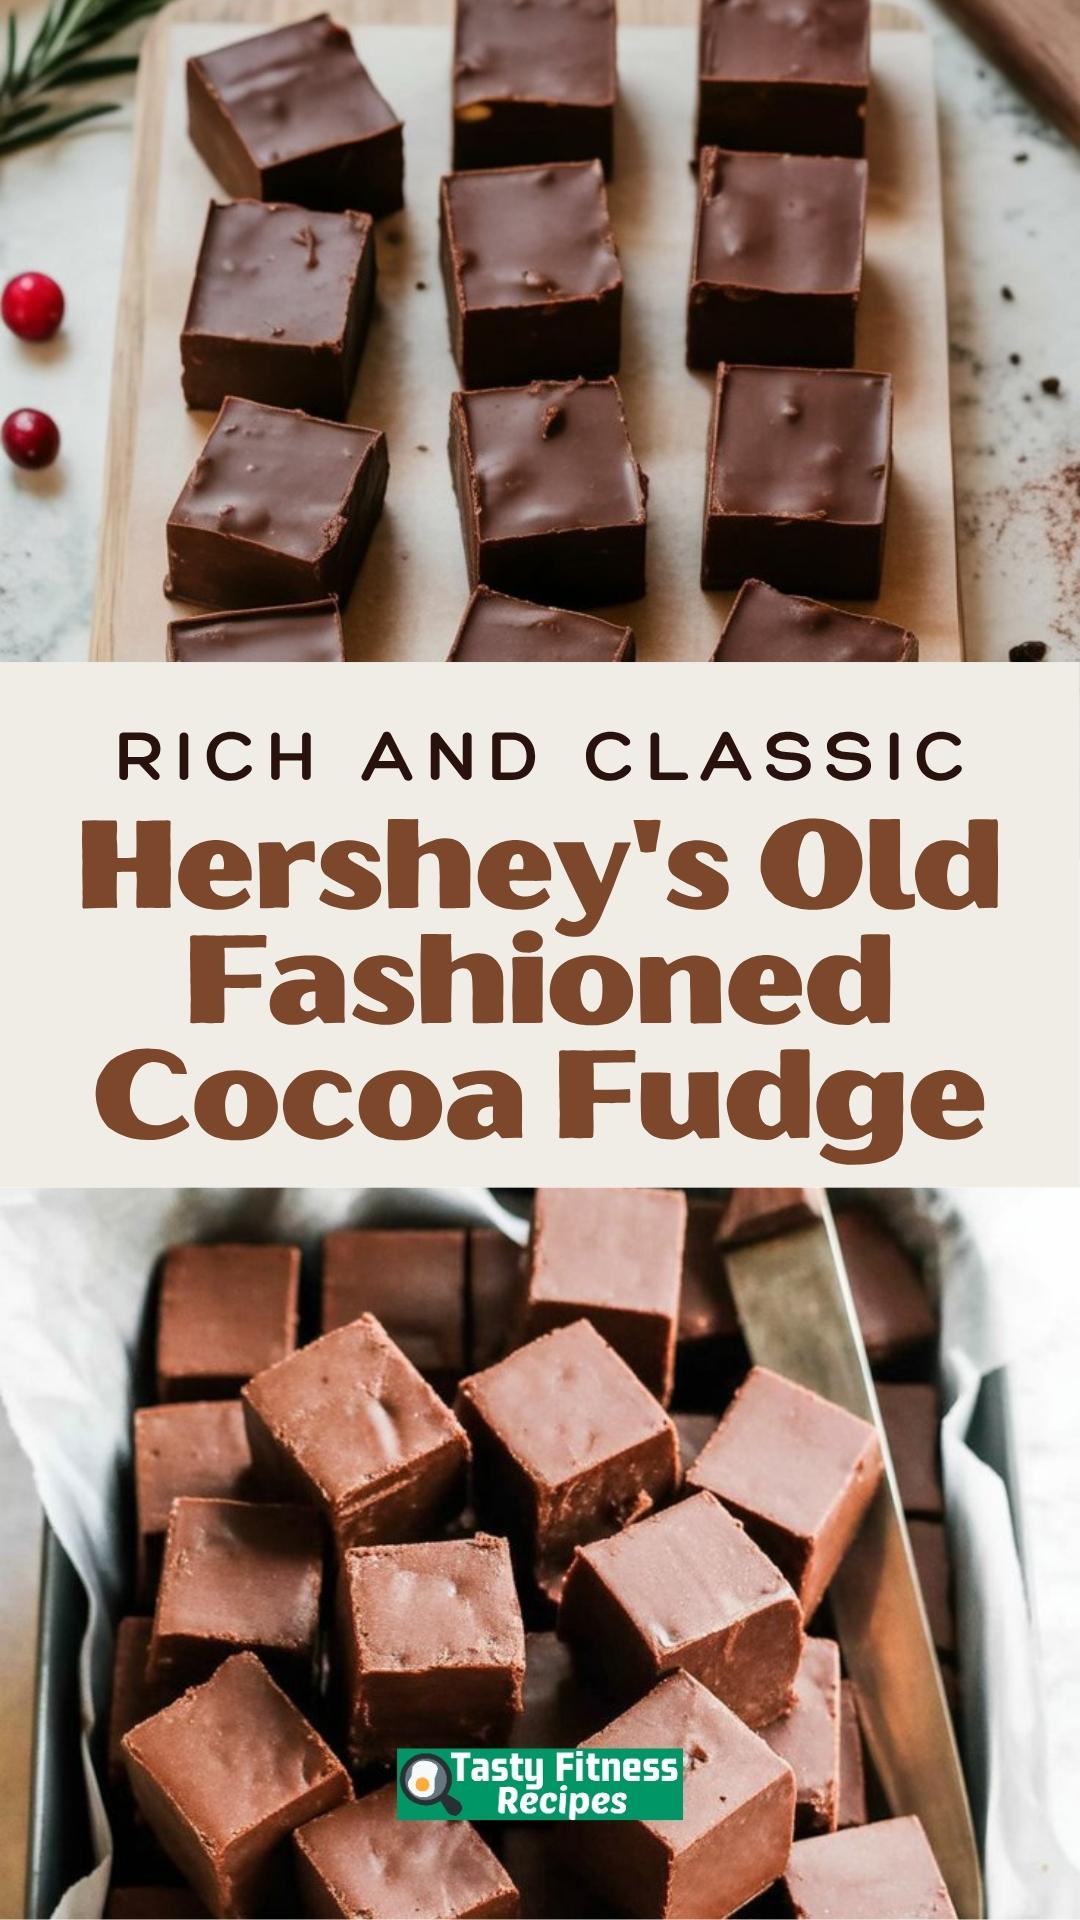
Yield: 15Hershey's Old Fashioned Cocoa Fudge

If there's one treat that brings me straight back to cozy holiday memories, it’s this rich, creamy Hershey’s fudge.
Prep Time 11 minutesCook Time 9 minutesAdditional Time 20 minutesTotal Time 40 minutesIngredients
- 7 oz jar of marshmallow creme
- 12 oz Hershey’s candy bars, chopped
- 12 oz semi-sweet chocolate chips
- ⅓ cup unsalted butter
- 4 ½ cups granulated sugar
- 1 (12 oz) can evaporated milk (not sweetened condensed)
Instructions
- Start by lining a 9x13-inch pan with parchment paper, leaving extra on the sides so you can easily lift the fudge out later. Set that aside while we get everything ready.
- In a stand mixer bowl (or a large mixing bowl if using a hand mixer or stirring by hand), add the chopped Hershey bars, chocolate chips, and the marshmallow creme. Don’t mix it yet—just have it ready.
- Grab a heavy-bottomed saucepan and pour in the sugar, evaporated milk, and butter. Set it over medium heat and stir constantly as it heats. Once it begins to boil with big, steady bubbles, clip on a candy thermometer. Keep stirring, and let it cook until it hits 236°F. Be sure not to increase the heat above medium—it’s a slow and steady process.
- Altitude tip: If you're above 1,000 feet, lower the target temp by 2°F for every 1,000 feet of elevation.
- When the hot mixture reaches temperature, carefully pour it over the chocolate and marshmallow creme in your mixer bowl. Mix it together on low speed using the paddle attachment until everything is melted and smooth. If you’re mixing by hand, be ready for a bit of an arm workout—but it’s worth it!
- Once combined, pour the fudge into your prepared pan. Resist the urge to scrape the pot—leave any crystallized bits behind to keep your fudge perfectly smooth.
- Let the fudge cool at room temperature for at least 4 to 6 hours. If you're not in a rush, letting it set overnight is best. Once firm, lift the fudge out using the parchment and cut it into small squares.
Notes
- Don’t rush the boil: Medium heat only. Too hot and your sugar might burn.
- Thermometer is key: 238°F is the sweet spot, but 236°F is ideal if you’re following the altitude rule.
- Skip the scraping: When pouring the hot mixture into the bowl, leave any sugar crystals behind in the pot.
- Avoid humid days: Fudge and rainy weather don’t mix.
- Want to add nuts? Stir them in after mixing the hot sugar into the chocolate.
Nutrition Information
Yield
15Serving Size
1
Amount Per Serving Calories 533Total Fat 16gSaturated Fat 9gTrans Fat 0gUnsaturated Fat 6gCholesterol 14mgSodium 71mgCarbohydrates 99gFiber 2gSugar 92gProtein 3gTastyFitnessRecipes.com, occasionally offers nutritional information for recipes contained on this site. This information is provided as a courtesy and is an estimate only. This information comes from online calculators. Although tastyfitnessrecipes.com attempts to provide accurate nutritional information, these figures are only estimates.
Questions You Might Be Wondering About
How long does fudge keep?
At our place, it’s gone in three days—but if you hide it well, it’ll last up to two weeks at room temperature in an airtight container. Longer if refrigerated or frozen.
Why didn’t my fudge set?
The sugar likely didn’t hit the right temperature. Get yourself a candy thermometer—seriously, it changes everything.
Why is my fudge grainy or hard?
Grainy = sugar crystals formed. Hard = sugar got too hot. Stick to 236°F and don’t scrape the sides of the pan.
Can I make thicker pieces?
Absolutely. Use an 8×8 pan instead of a 9×13 for chunkier squares.
If you’re planning a holiday tray or want a homemade gift that everyone actually gets excited about, this fudge is it. Make a batch, wrap up a few squares in wax paper, and share with neighbors—or keep it all for yourself. No judgment here.
Let me know how it goes—I’d love to hear if this becomes your new tradition too.
Try other Fudge recipes: