Brownies have always been my comfort dessert. I’m a big believer that you don’t need anything fancy to make something irresistible. This one-bowl brownie recipe is the kind of thing I rely on when friends show up unexpectedly or when the craving hits hard at 10 p.m.

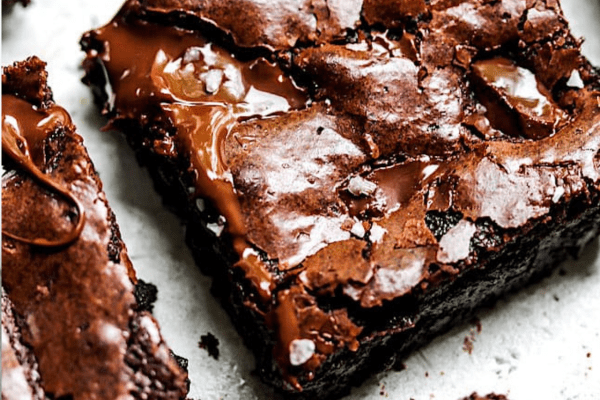
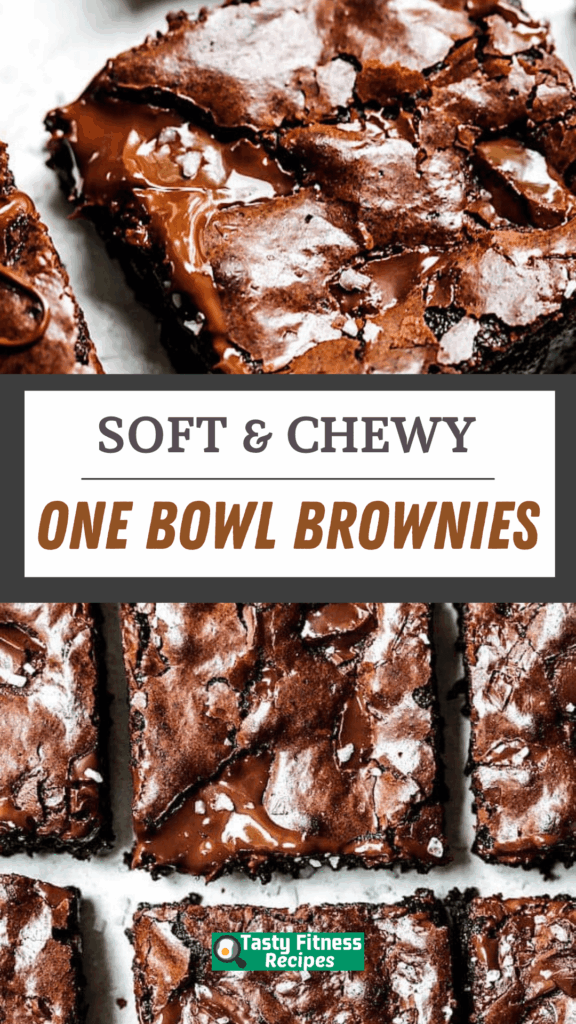
These are deeply chocolatey, chewy, with that beautiful shiny top that screams homemade goodness. The best part? You don’t even need a mixer. Just one bowl and a whisk. It’s the brownie I reach for time and again.
Why These Brownies Are Always a Hit
Let me tell you what makes these brownies the star of the dessert table at my place:
- They’re super easy. No stand mixer, no extra bowls to wash.
- The texture is spot-on: chewy edges, gooey middle.
- They’re full of deep chocolate flavor.
- That shiny, crackly top never fails to impress.
- They’re reliable—I’ve made them on tired weeknights, busy mornings before school events, and they always come out right.
This is the kind of recipe I trust enough to hand over to my teenager or even a friend who says they “can’t bake.”
Ingredients You’ll Always Have Around
I keep these ingredients stocked because you never know when a friend will pop in, or when you’ll want to sneak into the kitchen at midnight to bake something rich and chocolatey.
- Butter – I always use unsalted so I can control the salt. I usually melt it on the stovetop while I’m getting the sugar ready.
- Granulated Sugar and Brown Sugar – Don’t skip the brown sugar; it gives a bit of caramel-like moisture that makes these brownies so satisfying.
- Eggs – I like them at room temperature. When I forget, I stick them in warm water for a few minutes.
- Vanilla Extract – I don’t skimp here. It’s one of those small touches that gives homemade brownies their signature aroma.
- All-Purpose Flour – If I’m baking for friends who can’t have gluten, I’ve used a gluten-free blend with good results.
- Cocoa Powder – I tend to use Dutch-process for a deep color and smooth taste, but any unsweetened cocoa works.
- Espresso Powder – Totally optional, but if you want a serious chocolate kick, it’s worth it. Just a bit wakes up the cocoa flavor.
- Salt – I go for sea salt or kosher.
- Chocolate Chunks or Chips – I’ll use whatever I have on hand. Sometimes it’s chopped baking bars, sometimes it’s chocolate chips, but it all melts into pockets of goodness.
Add-Ins to Make Them Your Own
If you love a bit of crunch, go ahead and stir in some nuts. Walnuts and pecans are my usual choice. I’ve even thrown in chopped almonds once when that’s all I had. It’s a great way to make a single recipe feel different every time.
Which Pan Should You Use?
For most batches, I use a 9×13 metal pan. Metal gives me those crisp edges that my family fights over. If I’m baking for people who prefer the middle pieces (my wife, for example), I’ll sometimes switch to glass, knowing it’ll bake a bit slower and the edges won’t crisp as much.
When I want taller brownies for a special dessert plate, I’ll use a smaller pan like 8×12, but then I watch the baking time carefully so they don’t stay raw in the middle.
How I Make Them Step by Step
I’ve made these brownies so many times I can do it half-asleep. Here’s how I get them perfect every time:
- Prep the Pan – I line it with parchment and give it a spritz of cooking spray so the whole slab lifts out cleanly. No scraping the corners, no stuck-on edges.
- Mix the Wet Ingredients – In one big bowl, I whisk melted butter with both sugars, then add eggs and vanilla. It’s simple and satisfying.
- Sift the Dry Ingredients – Cocoa can clump. I always sift the flour and cocoa together. This step matters more than people think.
- Stir Gently – I fold everything just until it’s combined. Overmixing turns them cakey, which isn’t what I want here.
- Add the Chocolate – Chunks or chips, stirred in at the end. They melt into dreamy pockets throughout.
- Bake Just Enough – I start checking at 25 minutes. I’m looking for a toothpick with moist crumbs, not raw batter but not dry. The brownies finish setting as they cool.
- Cool Before Cutting – Hardest part for me. But I wait. A sharp knife is fine, but a plastic knife actually slices them really neatly without clinging crumbs.
My Personal Tips for Foolproof Brownies
- Don’t skip parchment. I used to think it was overkill until I tried lifting brownies without it. Never again.
- Melted butter should be warm but not hot. Hot butter scrambles the eggs. Learned that one the hard way.
- Don’t walk away and forget them in the oven. A few extra minutes can turn fudgy into dry.
- Make sure your cocoa is fresh. I once used a can that had been in the back of the pantry for a year, and it made them taste dull.
Storing Your Brownies
When I bake a pan for friends, I usually leave it whole and covered on the counter. It stays moist for up to four days.
If I cut them into squares, I’ll wrap them tightly in plastic. They start to dry faster once cut, so I try to finish those in a day or two.
I rarely refrigerate them. The fridge dries them out, in my experience.
If I want to make them ahead, I freeze big sections of the pan, tightly wrapped. They defrost beautifully at room temperature. I like freezing in larger chunks instead of squares—it keeps them tasting freshly baked.
Serving Ideas from My Kitchen
These brownies are pretty perfect on their own, but if I’m feeling generous (or showing off), I’ll do one of these:
- Warm brownie with a scoop of vanilla ice cream.
- Drizzle of homemade caramel or chocolate sauce.
- A little whipped cream and berries for a simple but pretty plate.
When I take these to parties, I always come home with an empty pan. People love them. No fancy frosting or decorations needed. Just rich, chocolatey goodness.
One Bowl Brownies
There’s nothing more comforting than the aroma of rich, gooey brownies wafting through the kitchen—and this one-bowl wonder delivers every time.
Ingredients
- 4 large eggs
- 1 tablespoon vanilla extract
- 1 cup unsweetened or Dutch-processed cocoa powder
- 1 cup all-purpose flour
- 1 cup granulated sugar
- 1 cup dark brown sugar, packed
- 1 cup unsalted butter, melted and slightly cooled
- 1 teaspoon kosher salt
- 1 teaspoon espresso powder (optional, but enhances the chocolate flavor)
- 1¼ cups chopped chocolate (divided)
Instructions
- Preheat and Prep: Set your oven to 350°F (175°C). Lightly grease a 9×13-inch baking pan and line it with parchment paper, allowing the paper to hang over the edges for easy removal. Give the parchment another light spray with oil.
- Mix the Base: In a large mixing bowl, whisk together the melted butter, granulated sugar, and brown sugar until glossy and well combined. Add the eggs one at a time, whisking thoroughly after each. Stir in the vanilla extract until the mixture is smooth.
- Add Dry Ingredients: Sift in the cocoa powder and flour directly into the wet mixture. Sprinkle in the salt and espresso powder (if using). Gently stir everything together until just incorporated—don’t overmix! The batter will be thick and rich.
- Chocolate Time: Fold in 1 cup of the chopped chocolate pieces. Pour the batter into your prepared pan, spreading it evenly with a spatula. Scatter the remaining ¼ cup of chopped chocolate over the top.
- Bake to Perfection: Bake on the middle rack for 25 to 30 minutes. The edges should be set, and the center slightly soft but no longer jiggly. A toothpick inserted near the center should come out with a few moist crumbs.
- Cool and Slice: Let the brownies cool in the pan before lifting them out using the parchment. Once cooled, cut into squares. For a little something extra, a pinch of flaky sea salt on top is absolute magic.
Notes
- Keep any leftovers in an airtight container at room temperature. They stay delicious for up to 4 days—but good luck making them last that long.
Nutrition Information
Yield
24Serving Size
1Amount Per Serving Calories 222Total Fat 11gSaturated Fat 7gTrans Fat 0gUnsaturated Fat 4gCholesterol 53mgSodium 75mgCarbohydrates 27gFiber 1gSugar 20gProtein 3g
TastyFitnessRecipes.com, occasionally offers nutritional information for recipes contained on this site. This information is provided as a courtesy and is an estimate only. This information comes from online calculators. Although tastyfitnessrecipes.com attempts to provide accurate nutritional information, these figures are only estimates.
If you want a brownie recipe that’s reliable, easy to remember, and always a crowd-pleaser, this is the one. It’s the recipe my friends ask me for most, and the one my family never gets tired of. Give it a try, and I bet you’ll keep it in your back pocket too.
Try other Brownies recipes: