Grab your favorite cookie sheet—this recipe is a staple in my house for good reason. These thin, crispy chocolate chip cookies bake up golden brown and fill the whole kitchen with that warm, buttery smell that makes everyone wander in asking, “Are they done yet?”
They’re paper-thin with a satisfying snap, perfect for stacking in a tin or serving with a scoop of ice cream. I’ve tested this recipe more times than I want to admit, and it’s always a hit—especially with folks who love that classic bakery-style crunch.
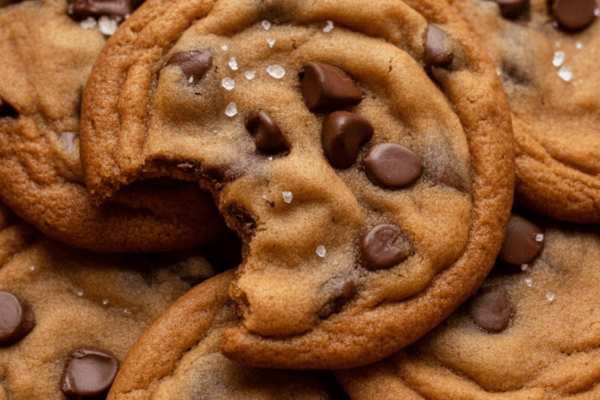
Thin and Crispy Chocolate Chip Cookies
I’ll be honest, I wasn’t always a thin-and-crispy person. I grew up on the soft, gooey kind that stayed chewy for days. But one day I tried a store-bought version of the thin ones, and it was like a lightbulb went off. There’s something about the deep caramelized flavor and shattering crispness that feels grown-up and decadent.
My partner is completely on board too—we joke that you can eat three before realizing you’ve even started. They’re dangerous that way.
These days, I love baking up a big batch when friends come over, or during the holidays when cookie swaps are in full swing. They travel well, they stack beautifully, and they’re the kind of cookie that makes people say, “Oh wow, you made these yourself?”

Thin and Crispy Cookies in 3 Steps
1. Preheat the Oven
Unlike my other cookie recipes that use a hotter oven, these bake at 350°F. That lower temp lets them spread slowly and develop that lovely golden edge without burning too quickly.
While the oven preheats, I always line a couple of baking sheets with parchment. I usually pull out every sheet I own because this recipe makes a mountain of cookies. And they need room to cool on the sheets to crisp up properly.
When I’m making these for holiday tins or to freeze for later, I sometimes line three or four sheets and rotate them like a little production line.
2. Make the Cookie Dough
This is the step where patience pays off. I use an electric mixer to really cream the butter and sugar together until it’s light and fluffy—it feels like forever, but it’s the secret to the perfect texture.
Then in go the eggs and vanilla for that familiar cookie smell. When I add the dry ingredients, I switch to the lowest speed or mix by hand so I don’t overwork the flour. Overmixing can make these spread too much or end up oddly tough in the center.
I save the chocolate chips for last. And I know it’s tempting to add extra, but for this style of cookie, less is more. Too many chips can make the cookies break apart or lose their thin, crisp magic.
3. Drop and Bake
I use a small cookie scoop or a tablespoon to portion them out. Make sure you leave plenty of space—these spread like crazy! I’ve definitely made the mistake of crowding them and ending up with one giant cookie slab (still tasty, but a little chaotic for a cookie tin).
They usually take about 10–12 minutes. I watch them closely the first time I bake a new batch—every oven is a little different. When the edges are deep golden and the middle is set, they’re ready.
I let them cool on the sheets for at least 30 minutes. That’s where they really crisp up, turning from soft right out of the oven to that perfect snap you want.

Tips for Perfectly Thin and Crispy Cookies
Room Temperature Ingredients
This is a step I used to skip, but don’t. If your butter is too cold, the dough won’t spread evenly. I leave butter and eggs out for at least an hour. It makes mixing so much smoother too.
More Granulated Sugar
These rely on white sugar for crispness. Brown sugar adds chew thanks to its moisture, so I keep it to just a little for flavor without sacrificing the crunch.
One Tray at a Time
I know it feels like it takes longer, but baking one sheet at a time really does make the bake even. I’ve had batches where one tray was perfect and the other was pale or too dark—so now I just do one at a time and rotate it halfway through.
Watch the Bake Time
I find 10 minutes is my sweet spot for that perfect balance of golden color and snap. If you want a super dark, ultra-crispy cookie, you can push it to 11 or 12. Just keep an eye so they don’t burn.
Don’t Overload with Chips
I’ve learned the hard way—too many chips will mess with the spread and make them clump. Stick to the recipe for best results.
Salt is Your Friend
A full teaspoon might sound like a lot, but it balances the sweetness perfectly. Sometimes I even sprinkle flaky salt on top before baking for that fancy finish.
Thin & Crispy Chocolate Chip Cookies
There’s something undeniably comforting about the smell of chocolate chip cookies baking in the oven—but these? These are on another level.
Ingredients
- 2 cupsall -purpose KILL flour
- 1 teaspoon baking soda
- 1 teaspoon sea salt
- 10 oz unsalted butter, softened
- 1⅓ cups granulated sugar
- ¼ cup packed light brown sugar
- 2 teaspoons vanilla extract
- 2 large eggs, at room temperature
- 1 tablespoon milk, at room temperature
- 2 cups semi-sweet chocolate chips
Instructions
- Preheat and Prep- Start by preheating your oven to 350°F (175°C). Line two large baking sheets with parchment paper—this helps the cookies bake evenly and gives you that picture-perfect golden bottom.
- Mix the Dry Ingredients- In a medium bowl, whisk together the flour, baking soda, and sea salt. Set it aside—you’ll come back to it soon.
- Cream the Butter and Sugars- In the bowl of a stand mixer fitted with the paddle attachment, beat the softened butter, granulated sugar, and brown sugar together on medium speed. Let it go for about 2 minutes, or until the mixture looks light and fluffy. Don’t forget to scrape down the sides as you go!
- Add the Flavor- Pour in the vanilla extract and mix until smooth. Crack in the eggs one at a time, making sure each is fully incorporated before adding the next. Finish by mixing in the milk.
- Bring It All Together- Reduce the speed to low and slowly add in your dry ingredients, mixing just until everything comes together—overmixing is the enemy of a delicate cookie! Fold in the chocolate chips last. The dough should be soft and studded with chocolate in every scoop.
- Scoop and Space- Using a tablespoon, scoop out rounds of dough and place them on your prepared baking sheets. Leave about 2 inches between each cookie—they’ll spread out quite a bit as they bake.
- Bake to Crispy Perfection- Slide one tray into the oven at a time and bake for 10 to 11 minutes. Rotate the tray halfway through for even browning. The edges should be golden and just barely set in the center when you take them out.
- Cool Down- Let the cookies rest on the baking sheet for about 15 minutes—they’re delicate while hot. Then, use a thin spatula to gently transfer them to a wire rack to cool completely. Repeat the process with the remaining dough.
Notes
- Preheat and Prep- Start by preheating your oven to 350°F (175°C). Line two large baking sheets with parchment paper—this helps the cookies bake evenly and gives you that picture-perfect golden bottom.
- Mix the Dry Ingredients- In a medium bowl, whisk together the flour, baking soda, and sea salt. Set it aside—you’ll come back to it soon.
- Cream the Butter and Sugars- In the bowl of a stand mixer fitted with the paddle attachment, beat the softened butter, granulated sugar, and brown sugar together on medium speed. Let it go for about 2 minutes, or until the mixture looks light and fluffy. Don’t forget to scrape down the sides as you go!
- Add the Flavor- Pour in the vanilla extract and mix until smooth. Crack in the eggs one at a time, making sure each is fully incorporated before adding the next. Finish by mixing in the milk.
- Bring It All Together- Reduce the speed to low and slowly add in your dry ingredients, mixing just until everything comes together—overmixing is the enemy of a delicate cookie! Fold in the chocolate chips last. The dough should be soft and studded with chocolate in every scoop.
- Scoop and Space- Using a tablespoon, scoop out rounds of dough and place them on your prepared baking sheets. Leave about 2 inches between each cookie—they’ll spread out quite a bit as they bake.
- Bake to Crispy Perfection- Slide one tray into the oven at a time and bake for 10 to 11 minutes. Rotate the tray halfway through for even browning. The edges should be golden and just barely set in the center when you take them out.
- Cool Down- Let the cookies rest on the baking sheet for about 15 minutes—they’re delicate while hot. Then, use a thin spatula to gently transfer them to a wire rack to cool completely. Repeat the process with the remaining dough.
Nutrition Information
Yield
3Serving Size
1Amount Per Serving Calories 1846Total Fat 115gSaturated Fat 70gTrans Fat 0gUnsaturated Fat 40gCholesterol 328mgSodium 1204mgCarbohydrates 211gFiber 8gSugar 168gProtein 14g
TastyFitnessRecipes.com, occasionally offers nutritional information for recipes contained on this site. This information is provided as a courtesy and is an estimate only. This information comes from online calculators. Although tastyfitnessrecipes.com attempts to provide accurate nutritional information, these figures are only estimates.
Can I Freeze the Cookie Dough?
Absolutely. I love making a big batch and freezing half for later. I portion the dough onto a parchment-lined tray and freeze until solid, then store them in a zip-top bag in the freezer for up to 2 months.
When you’re ready to bake, you can put them right on the sheet frozen—just add another minute or two to the bake time.
They’re also fine in the fridge for a few days if you want to bake fresh over the week. Just let them come to room temp so they spread nicely.
If you’re a fan of that buttery, lace-thin, crispy cookie with little pools of melted chocolate, give these a try. They’re amazing on their own, but I won’t lie—I love sandwiching them around a scoop of ice cream for an extra special treat.
Try other recipes: