Brownies that come out of the oven with those gorgeous crackly tops, gooey centers, and deep chocolate flavor? That’s my kind of baking day. This is the brownie recipe I come back to again and again, especially when I want something quick, comforting, and rich without grabbing a boxed mix. They’ve got that chewy bite, a soft fudgy middle, and a whole lot of chocolate in every square.
I started baking these on rainy afternoons, and over the years, they’ve turned into our go-to for birthdays, potlucks, or just a “we need chocolate now” kind of moment.

Why These Brownies Are a Regular in My Kitchen
These aren’t your overly complicated bakery-style brownies that call for four different types of chocolate and a candy thermometer. These are the ones you can pull together from pantry staples—flour, eggs, cocoa, sugar—and still get that shiny, crackled top and soft center that make brownies irresistible.
What I really love is how forgiving this recipe is. You don’t need fancy mixers or techniques. Just a bowl, a whisk, and a little patience to let the butter melt just right. The chocolate chips? Totally worth it. They melt into little gooey pockets that surprise you in the best way.
Cocoa Powder Talk: Natural vs Dutch-Processed
Let’s clear this up: both types of cocoa work here. I use whichever I have on hand. Natural cocoa gives you a slightly lighter brownie with a more classic cocoa taste, while Dutch-process makes them deeper in color and more intense in flavor. If I’m making them for grown-up guests, I go Dutch. For the kids? Natural cocoa keeps it sweet and simple.
Want Even More Chocolate Flavor? Try These Tricks
Here’s what I’ve picked up from years of tweaking:
-
Use a good cocoa powder – I usually go for Ghirardelli or Guittard when I can. But honestly? Hershey’s gets the job done just fine in a pinch.
-
Add vanilla – Just a little splash lifts the chocolate and makes everything taste richer.
-
A touch of espresso powder – This isn’t about turning your brownies into coffee desserts. It just deepens the chocolate without anyone knowing. I keep a jar in the pantry just for this.

Your Brownie Ingredient Breakdown (And Why It Matters)
Every ingredient here has a job. Let me walk you through what I’ve learned from baking dozens of batches:
-
All-purpose flour: Stick to the basics here. Alternative flours change the texture too much.
-
Baking powder: Just enough lift to keep them from being too dense.
-
Salt: I always add a pinch. And if I’m feeling a little extra? A sprinkle of sea salt on top before baking.
-
Cocoa powder: Use what you have, but don’t skimp.
-
Butter: Melted, not softened. This gives that shiny top and adds serious flavor.
-
Oil: I use canola or vegetable oil. A bit of oil keeps them moist longer than butter alone.
-
Sugar: Granulated only. I tried brown sugar once—it made them too soft and a bit weirdly chewy.
-
Eggs + an extra yolk: That yolk makes a big difference in richness without making them cakey.
-
Chocolate chips: I throw in dark chocolate chips or chop up a good bar. You can mix it up with peanut butter chips, white chocolate, or whatever you love.
-
Optional nuts: Walnuts or pecans are great if you want some crunch.
How to Get That Signature Crackly Top
This is what makes people think your brownies came from a fancy bakery. Here’s what matters:
-
Melt the butter with some of the sugar – This is key. It helps form that glossy top later.
-
Whisk your eggs really well – I mean really whisk. This brings in the air that helps form those little sugary crusts.
-
Combine hot butter with cool eggs slowly – Trickle it in while whisking constantly. Go slow or you’ll scramble the eggs.
-
Don’t over mix once the dry ingredients go in – Stir until just combined. Overdoing it makes them cakey.
-
Fold in chocolate chips gently – Less stirring equals better texture.
My Go-To Pan Setup
I always reach for my metal 9×9-inch baking pan. It bakes evenly and gives that perfect edge-to-center ratio. Line it with parchment paper so you can lift the brownies out easily once they’ve cooled. If you’re doubling the recipe, go for a 9×13-inch pan and adjust the bake time a little.
Skip the glass or ceramic pans if you can. They take longer to heat up, and I’ve often ended up with overbaked edges and underbaked middles when I used them.

Little Tips That Make a Big Difference
-
Use both butter and oil – This combo keeps things rich and soft.
-
Don’t overbake – This is the one rule you should never break. I start checking around 25 minutes. A slight jiggle in the center means they’re just right.
-
Cool completely before cutting – This is the hardest part. But if you slice them too early, they’ll be a mess. I usually leave them in the pan for a couple of hours on the counter, then slice.
How I Store and Freeze Them
When I bake a batch, I usually save a few squares for later. Here’s what works best for me:
-
Room temp: They’re fine for up to 3 days in an airtight container.
-
Fridge: Lasts around 5 days. I like to zap them in the microwave for a few seconds before eating.
-
Freezer: Let them cool completely first. I wrap individual squares in plastic wrap, then put them in a zip-top freezer bag. They’ll stay good for 2 months. I label the bag with the date and hide them behind the frozen peas so I don’t eat them all in one go.
Frequently Asked Questions
Can I skip the eggs?
This recipe really depends on the eggs for structure and richness, so I don’t recommend leaving them out or using substitutes.
Can I use coconut oil?
Yes, as long as it’s refined. Unrefined coconut oil might give the brownies a coconut aftertaste, which may or may not work for you.
Why are my brownies cakey instead of fudgy?
Most likely, the batter was overmixed or overbaked. Next time, stir gently and pull them from the oven earlier.
Can I make these with less sugar?
I’ve tried it. They don’t turn out the same. The sugar helps form that crackly top and gives the right texture.
Fudge Brownies
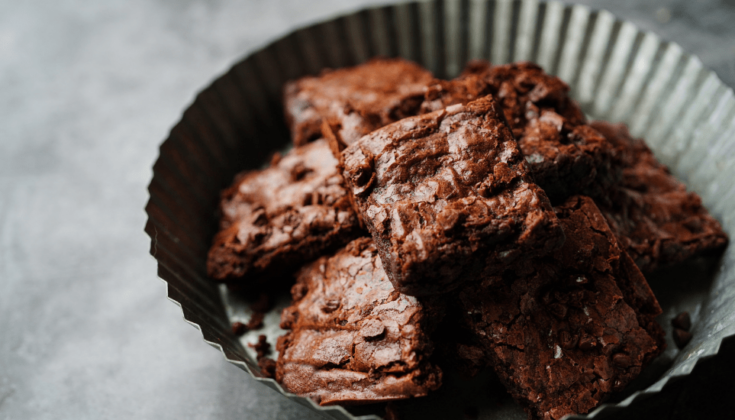
Ditch the boxed mix—these cocoa fudge brownies are rich, chewy, and deeply chocolatey with just the right amount of crackly top. A homemade treat that feels indulgent but comes together in no time.
Ingredients
- 1 cup all-purpose flour (120g)
- ¾ cup chocolate chips
- ½ teaspoon salt
- ½ cup unsweetened cocoa powder (43g)
- ½ teaspoon baking powder
- 1 teaspoon espresso powder (optional, skip if you're not a coffee fan)
- ¾ cup unsalted butter (170g)
- 2 tablespoons oil (canola, vegetable, or coconut)
- 1⅓ cups granulated sugar (265g), divided
- 1 egg yolk
- 2 large eggs
- 2 teaspoons vanilla extract (optional but recommended)
Instructions
- Preheat your oven to 350°F (175°C). Line a 9×9-inch square pan with parchment paper, letting a bit hang over the sides for easy lifting later. Lightly grease with baking spray and set aside.
- In a large bowl, sift together flour, baking powder, salt, cocoa powder, and espresso powder if using. This dry mix will be your chocolate base.
- In a small saucepan over medium heat, melt the butter along with the oil and ⅓ cup of the sugar. Stir frequently until the mixture is fully melted and glossy, then remove it from the heat to cool slightly.
- Meanwhile, in a separate mixing bowl, whisk together the eggs, extra yolk, the remaining sugar, and vanilla extract until light and slightly frothy—about 30 seconds of whisking does the trick.
- Slowly drizzle in the warm butter mixture into the egg mixture, whisking constantly as you pour. This gentle approach helps bring everything together without scrambling the eggs.
- Once combined, add the dry ingredients and chocolate chips into the bowl. Use a rubber spatula to gently fold everything together just until the dry streaks disappear. Don’t overmix—this is where chewy turns into cakey if you're not careful.
- Pour the batter into your prepared pan and spread it out evenly. The surface should be thick and glossy.
- Bake for 28 to 30 minutes, or until the top is set with shiny cracks and the edges feel firm. If you love super gooey brownies, check them around the 27-minute mark. Prefer a bit more structure? Let them go up to 32 minutes.
- Remove from the oven and place the pan on a wire rack. Let the brownies cool completely in the pan—at least 2 hours—before slicing for clean, fudgy squares.
Notes
- Don’t skip the parchment paper—it makes lifting and cutting much easier.
- That extra egg yolk is your secret weapon for ultra-chewy texture.
- Let them cool fully! Warm brownies will fall apart and won’t show their fudgy center just yet.
Nutrition Information
Yield
16Serving Size
1Amount Per Serving Calories 248Total Fat 14gSaturated Fat 7gTrans Fat 0gUnsaturated Fat 6gCholesterol 58mgSodium 93mgCarbohydrates 30gFiber 1gSugar 21gProtein 3g
TastyFitnessRecipes.com, occasionally offers nutritional information for recipes contained on this site. This information is provided as a courtesy and is an estimate only. This information comes from online calculators. Although tastyfitnessrecipes.com attempts to provide accurate nutritional information, these figures are only estimates.
Let me know how these turn out for you. I’ve made these for bake sales, birthdays, and once even at midnight when a friend needed cheering up. They never fail to hit the spot.
If you’re keeping this recipe, I promise you—this one’s a keeper.
Try other fudge recipes: